Wednesday, November 26, 2014

Taking the Yamaha LS3 apart

Although the frame was still solid it was covered in rust and the black paint was peeling on several spots. This bike is in desperate need of some TLC. A couple of days before I started the disassembly I soaked all the bolts and screws daily in WD40. They all came out pretty easy and undamaged, the only two screws giving trouble are the ones holding the ignition coil, Grrr...
Before you can take out the engine remove the fuel tank. Don't forget to empty it, or put something in the fuel hose between the left and right side of the tank. Same story for the separate oil tank.

Removed circlip of the shift pedal Yamaha LS3 1972
Removed circlip of the shift pedal Yamaha LS3

Taking off the shift pedal mechanism Yamaha LS3
Taking off the shift pedal mechanism

Removed crankcase cover Yamaha 100 LS3
Removed crankcase cover, remove it together with the clutch cable

Original chain Yamaha LS3 100cc
Still the original chain see the yellow dot

After a bit of cleaning
Next thing is to remove the throttle cable together with the valve, disconnect the air filter joint and all the wiring connected to the engine.
Normally you also have to remove the oil pump cable but mine had been removed years ago.

Removing the throttle cable and valve Yamaha 100 LS3
Removing the throttle cable and valve

Oil tank Yamaha LS3
Oil tank Yamaha LS3

Engine and frame separated Yamaha 100LS3 1972
Engine and frame separated

Getting there


After taking a lot of pics from the wiring I disconnected all the cables. It looks like they are all still original with the right colours.

Disconnecting all the wiring

Handle bar and wiring Yamaha LS3

Original cable harnas Yamaha LS3, and a bit of rust...

 Actually the rust gave me some trouble... When I tried to remove the left inner fork it wasn't moving at all. It was rusted into the upper triple tree. It took me two days of WD40, wiggling, hammering and @#$! to separate it from the triple tree.

Rusted inner fork and upper triple treeYamaha LS3

Front fork in bits Yamaha 100 LS3 1972
Front fork in bits

Frame Yamaha LS3 100
Almost done


Saturday, October 11, 2014

Specifications, Media and service table Yamaha LS3

Right after purchasing the Yamaha LS3 I started looking for a service manual and a parts manual. I found  them for a couple of dollars on eBay.

Yamaha model LS3 Parts List 1972

Yamaha 100 LS3 Service Manual

If you wanna work on your bike you really need those books.Searching for the LS3 won't get you far, but if you have the parts list and look up the number of a part you need it will pop up if it's still available. Like most motorcycle manufactures in those days Yamaha used the same parts on many different models.
Tip: right click on an image and choose open in new window to see it full size (easier to read ;).

Yamaha LS3 specifications - 1

Yamaha LS3 specifications - 2

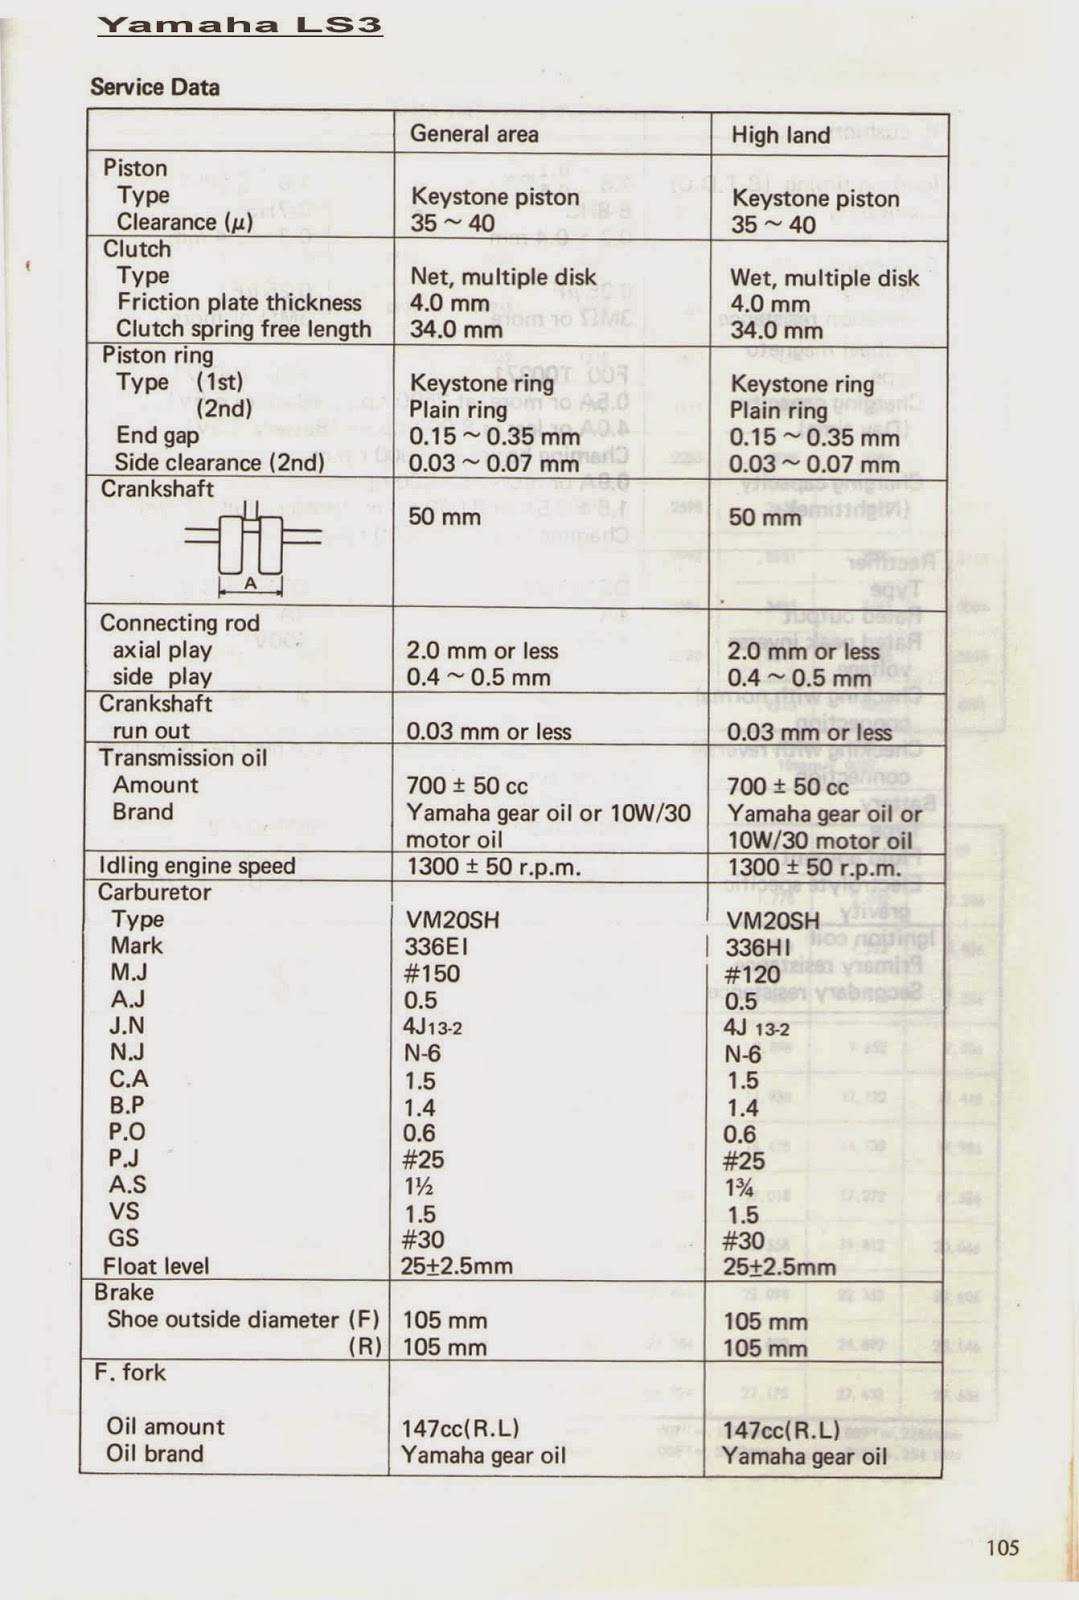
Yamaha LS3 Service Data - 1

Yamaha LS3 Service Data - 2

Yamaha LS3 Wiring Diagram

I couldn't find any data about production numbers etc., so I sent an e-mail to Yamaha. They replied the same day and wrote that they don't have those records anymore. However they were only build in 1972 as you can see in the list I got from Yamaha customer service. Model number is 336.

Yamaha motorcycle model list early seventies
Yamaha model list early seventies

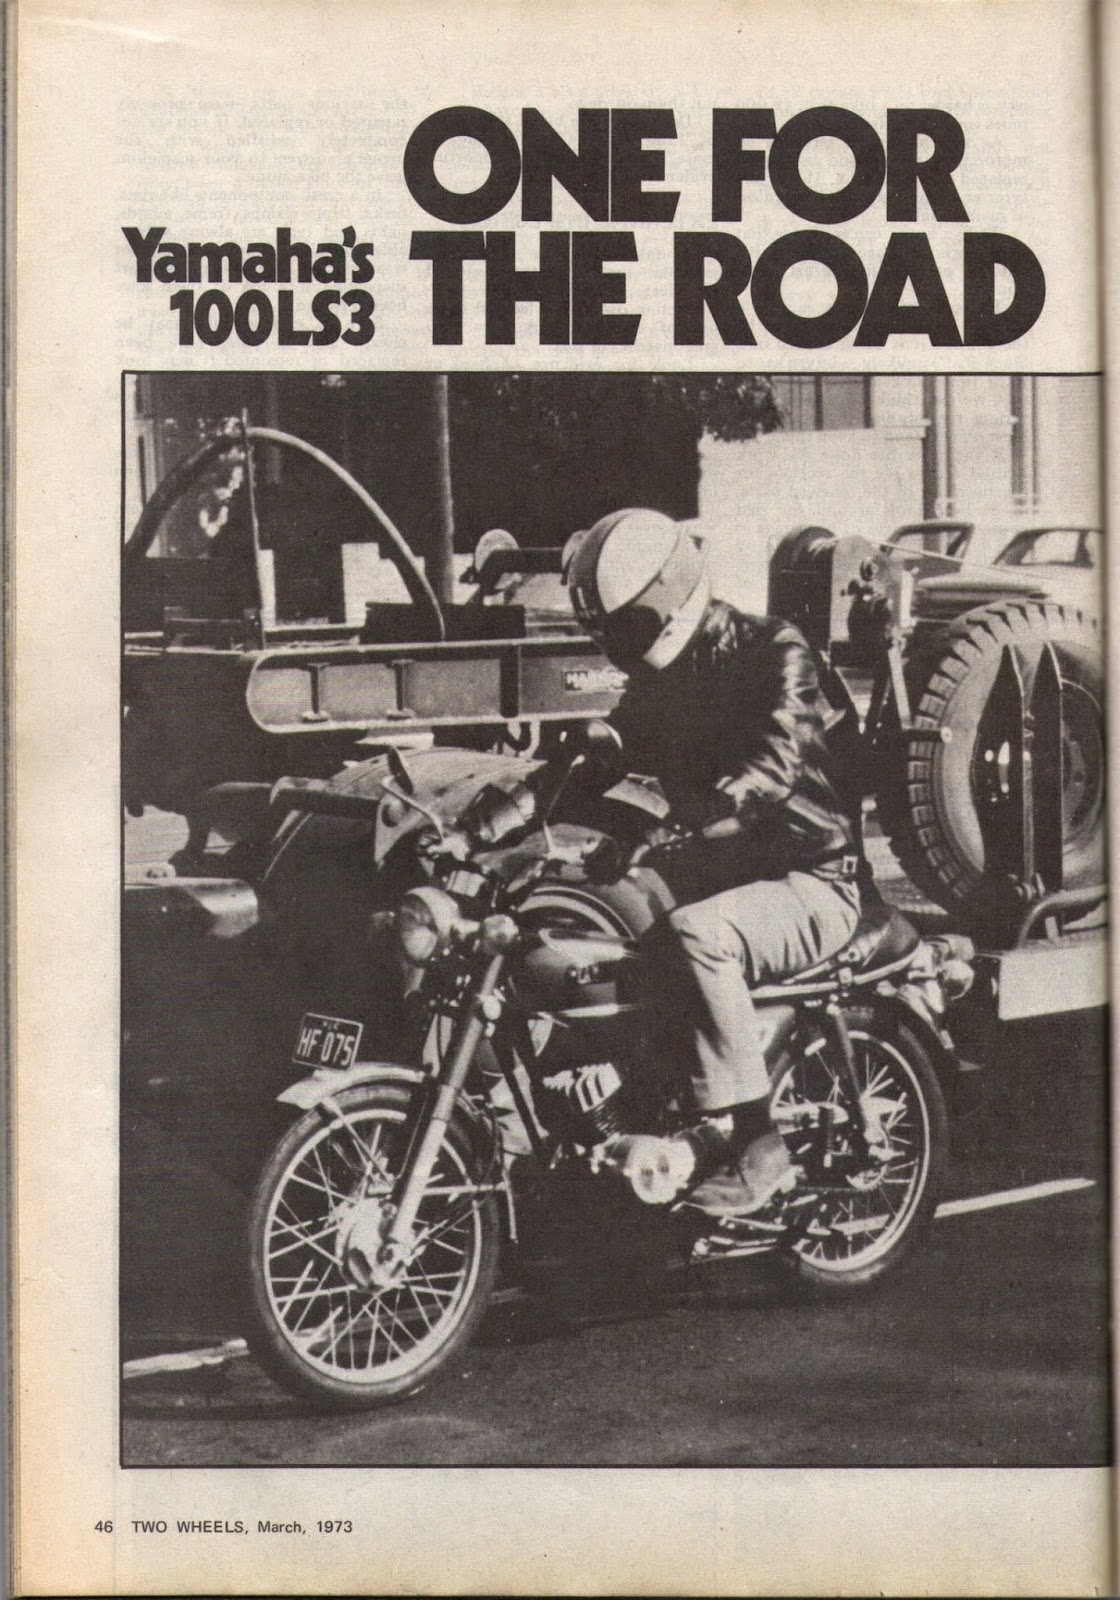
Yamaha 100 LS3 in "Two wheels" edition march 1973.

Yamaha 100 LS3 in "Two wheels" edition march 1973
Page 1

Yamaha 100 LS3 in "Two wheels" edition march 1973
Page2

Yamaha 100 LS3 in "Two wheels" edition march 1973
Page 3

Yamaha 100 LS3 in "Two wheels" edition march 1973
Page 4

Check the price for a new Yamaha 100  LS3 in 1973..... A depreciation of around 4 dollars a year, that's a good investment ;)
I also found a Journal for the World Wide Yamaha Dealers - Yamaha News September1972 ..

Yamaha 100 Street LS3 in Yamaha Dealer News September 1972

Yamaha 100 Street LS3 in Yamaha Dealer News September 1972

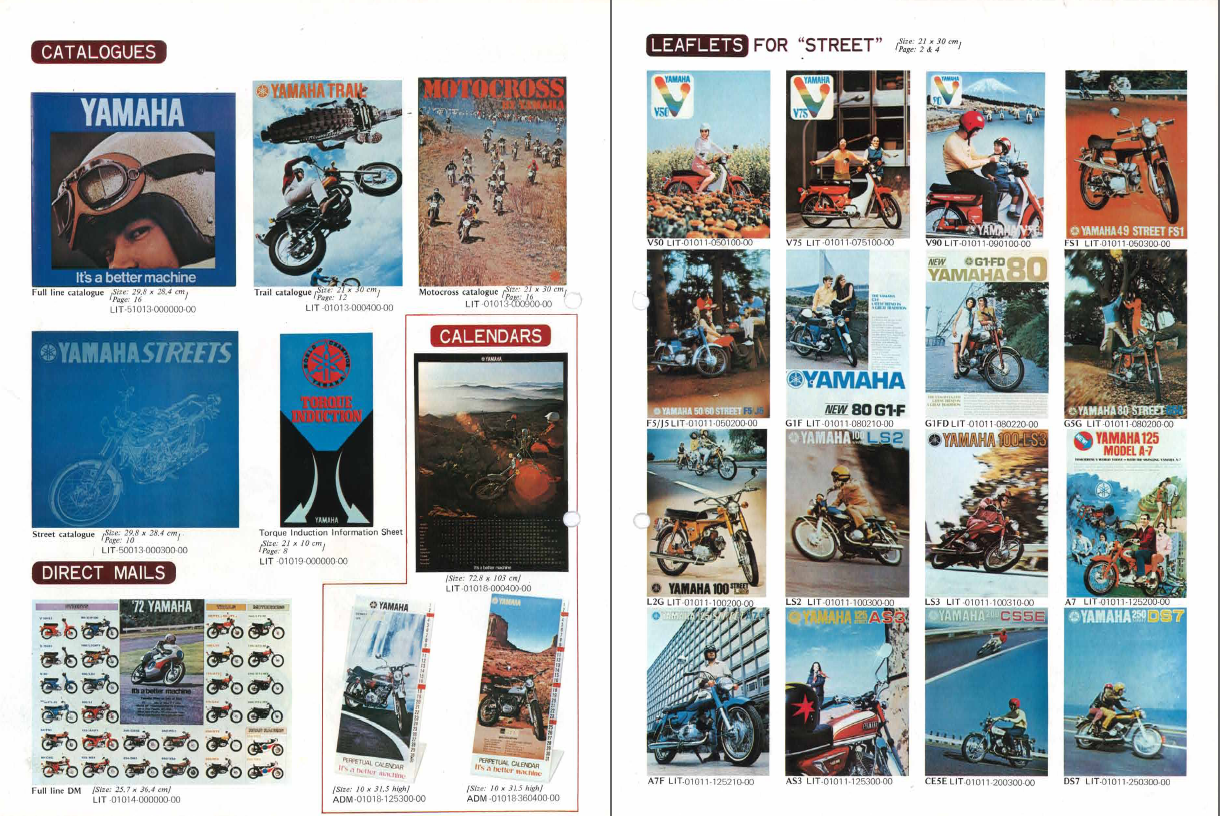
Yamaha Advertising News Special Issue 1972
Yamaha Advertising News Special Issue 1972 page 1

Yamaha Advertising News Special Issue 1972
Yamaha Advertising News Special Issue 1972-page 2+3

Yamaha Advertising News Special Issue 1972
Yamaha Advertising News Special Issue 1972 page 4+5

Yamaha Advertising News Special Issue 1972
Yamaha Advertising News Special Issue 1972 page 6+7

Yamaha Advertising News Special Issue 1972
Yamaha Advertising News Special Issue 1972 page 8


Saturday, September 27, 2014

Trim strip seat

The original seat was in pretty bad shape, a big hole in the vinyl cover and the seat pan was rusted through in some spots.

Rusted through seat pan Yamaha 100LS3
Rusted through seat pan Yamaha LS3

 Luckily I found a nice replacement but this one was without the stainless steel trim strip. The strips slide over  aluminium rivets that go through the metal seat pan and are fastened by clips on the inside of the pan.

Aluminium rivet Yamaha LS3 seat
Aluminium rivet


I carefully pried off the clips so I could reuse them later. When the rivets are coming loose just slide the trim till the round opening reaches the rivet head and take it off.

Taking off the stainless steel trim - Yamaha LS3 seat


Left and right strip Yamaha LS3 seat are different

At first I thought one of the short strips was a bit bent but after checking pics in the official sales brochure I found out the right side strip is indeed different from the left strip.

Now the hardest part, measuring and locating the right spots for the rivets in the new seat. Most important thing is that the holes are at the same height (if you want the strips to be nicely horizontal). With a 3.5 mm drill I drilled the holes from the inside of the seat pan. Drill with very low rpm's so you won't damage/burn the vinyl cover.

Drilling rivet holes in the seat pan - Yamaha LS3

First rivet is in
First of three trim strips...

Don't put the clips on straight away but wait till the trim strip is exactly in the right spot, it's really hard to peel 'm off again..


New seat with reused trim strips - Yamaha 100LS3 1972
New seat with reused trim strips - Yamaha LS3

New seat with reused trim strips - Yamaha LS3
I also re-used the original hinges from the old seat because they were a better fit than the new ones.

Original seat hinges re-used - Yamaha LS3


Thursday, September 25, 2014

Cleaning the chrome work

The paint and chrome work of the Yamaha LS3 were in pretty bad condition. After a good wash I started to clean up the chrome work or what was left of it. I used a painters razor blade to cut of the rust.

Scraping of the rust with a razor blade Yamaha 100cc
Scraping of the rust with a razor blade

Cleaning the exhaust

 If there's a tiny little hole in the chrome, the metal underneath it starts rusting an all the rust will find its way out and forming a "rust stain" on top of the chrome work. If it's really bad the rust will also go underneath the chrome and push it up. If the chrome is that bad you can't restore it, re-chroming is the only solution if you want to make it look good again. You'll be surprised how good rusted chrome can look again. After carefully scraping off the rust I polished it with chrome polish. Looking way better than before but... some parts were to far gone.

After removing most of the rust
 The exhaust was pretty bad, it's really pitted and on some parts the chrome is completely gone. Still looking better than before all the scraping.

Looking better

Yamaha 100LS3
Yamaha LS3