Saturday, September 27, 2014

Trim strip seat

The original seat was in pretty bad shape, a big hole in the vinyl cover and the seat pan was rusted through in some spots.

Rusted through seat pan Yamaha 100LS3
Rusted through seat pan Yamaha LS3

 Luckily I found a nice replacement but this one was without the stainless steel trim strip. The strips slide over  aluminium rivets that go through the metal seat pan and are fastened by clips on the inside of the pan.

Aluminium rivet Yamaha LS3 seat
Aluminium rivet


I carefully pried off the clips so I could reuse them later. When the rivets are coming loose just slide the trim till the round opening reaches the rivet head and take it off.

Taking off the stainless steel trim - Yamaha LS3 seat


Left and right strip Yamaha LS3 seat are different

At first I thought one of the short strips was a bit bent but after checking pics in the official sales brochure I found out the right side strip is indeed different from the left strip.

Now the hardest part, measuring and locating the right spots for the rivets in the new seat. Most important thing is that the holes are at the same height (if you want the strips to be nicely horizontal). With a 3.5 mm drill I drilled the holes from the inside of the seat pan. Drill with very low rpm's so you won't damage/burn the vinyl cover.

Drilling rivet holes in the seat pan - Yamaha LS3

First rivet is in
First of three trim strips...

Don't put the clips on straight away but wait till the trim strip is exactly in the right spot, it's really hard to peel 'm off again..


New seat with reused trim strips - Yamaha 100LS3 1972
New seat with reused trim strips - Yamaha LS3

New seat with reused trim strips - Yamaha LS3
I also re-used the original hinges from the old seat because they were a better fit than the new ones.

Original seat hinges re-used - Yamaha LS3


Thursday, September 25, 2014

Cleaning the chrome work

The paint and chrome work of the Yamaha LS3 were in pretty bad condition. After a good wash I started to clean up the chrome work or what was left of it. I used a painters razor blade to cut of the rust.

Scraping of the rust with a razor blade Yamaha 100cc
Scraping of the rust with a razor blade

Cleaning the exhaust

 If there's a tiny little hole in the chrome, the metal underneath it starts rusting an all the rust will find its way out and forming a "rust stain" on top of the chrome work. If it's really bad the rust will also go underneath the chrome and push it up. If the chrome is that bad you can't restore it, re-chroming is the only solution if you want to make it look good again. You'll be surprised how good rusted chrome can look again. After carefully scraping off the rust I polished it with chrome polish. Looking way better than before but... some parts were to far gone.

After removing most of the rust
 The exhaust was pretty bad, it's really pitted and on some parts the chrome is completely gone. Still looking better than before all the scraping.

Looking better

Yamaha 100LS3
Yamaha LS3


Wednesday, September 24, 2014

Pre-start checking the Yamaha LS3

Yamaha 100 LS3 1972
Yamaha 100 LS3 1972
The first thing I did was looking for a new ignition switch. I found a nice NOS one on eBay. Luckily the wiring wasn't butchered so it was just a matter of rerouting and connecting the wires.

New NOS Yamaha LS3 ignition switch

Old and new ignition switch Yamaha LS3 1972
Old and new ignition switch

Wiring inside headlight Yamaha LS3 100cc
Wiring inside headlight Yamaha LS3

Speedometer Yamaha LS3 100cc
Speedometer Yamaha LS3

The Yamaha LS3 has a 6V circuit, the stop light, flashers, "dashboard" lights and horn are supplied with electricity from a battery, the head- and taillight from the flywheel magneto. 6V globes are a bit harder to get, especially the odd shaped head light bulb.

6V bulbs Yamaha LS3
6V bulbs Yamaha LS3

After reconnecting the clutch cable I found out the clutch wouldn't disengage. This normally happens when an engine hasn't been running for a long time and who knows how long the bike has been sitting in the shed.. So it wasn't a big surprise.

I also changed the transmission oil, better save than sorry. Yamaha advised Yamaha oil or 10W30 but that was 42 years ago and the additives in most oils changed. So I bought Castrol MTX 80W, it's designed for 2 stroke transmissions and also prevents the wet clutch from slipping.

After changing the trannie oil I also checked the compression. Normally a 2-stroke engine (50-500cc) should have a compression between 120-190 psi. So the 135 psi is OK for now.

Measuring the compression 100cc 2 stroke engine
Measuring the compression
Next thing to do was cleaning the exhaust (inside), fuel cock and tank. Luckily the tank was really clean, no rust at all.. But the fuel cock was filled and completely blocked with dirt.
The muffler (silencer) was also completely blocked with oil, dust, rust and whatever more..

Blocked fuel cock Yamaha LS3

Cleaning the Fuel cock LS3
Cleaning the Fuel cock
The fuel cock was also leaking a bit, right behind the lever. After polishing the inside edges and bending the round spring a bit extra the problem was solved.

Clogged Muffler Yamaha LS3 100 1972
Clogged silencer Yamaha LS3

Clogged silencer Yamaha LS3

Silencer after some cleaning

The Yamaha LS3 has a Autolube. This is a little pump that will deliver oil to the 2 stroke engine. The amount of oil delivered depends on the throttle opening and engine speed. The Autolube is driven by the engine and is also connected to the throttle. Unfortunately it was pretty common in those days to disconnect the Autolube by removing the throttle cable and to mix the petrol and oil in the fuel tank. The reason for this was that people often forgot to refill the separate oil tank and back in the days premix was available at most petrol stations,  So a new hard to get cable is on my wish list.


Autolube system Yamaha LS3 1972
I made my own premix: 40 parts of fuel and one part of 2 stroke racing oil (40:1) and put 0.5 L in the fuel tank. Time for the big moment, Starting the LS3.
It started almost immediately and produced lots of smoke :)

The clutch was still not working so while the bike was on the centre stand I revved the engine and started to put some pressure on the rear brake. After the third try it came loose.

Starting the Yamaha LS3 for the first time after many years


Saturday, September 20, 2014

Barnfind Yamaha LS3 1972


Yamaha LS3 1972
Yamaha LS3 1972
Searching the net for a new project I was shocked by the asking prices for older bikes. Intentionally I was looking for a Honda CB750, CB500, CB550, Kawasaki Z650, etc. A long time ago I used to buy these models at a wrecker for a couple of hundred dollars and started the resto on my kitchen table.
Here some pics of my previous resto bikes:

Kawasaki Z650 1978
Kawasaki Z650 1978

Honda Cb500 1976 with 550 engine

Honda CB750 K7 1978
Honda CB750 K7 1978

Honda CB750 K7 1978
Actually I had two Honda K7 bikes ;)

I always started a resto for the fun of it, not to make money. But paying a couple of grant for a barrel before even starting the resto, hmmm....no bro.

Sooo... time for a change, I started looking for cheaper old (seventies) bikes and I really liked the looks of the stylish Yamaha 100cc road models. Especially the LS, RS and RD models.

The LS (both the LS2 and LS3) models are pretty rare and luckily still valued like in the old days, so when I found one last week it wasn't a difficult decision.

It's a 1972 Yamaha LS3, rusty, flat tyres, no keys, but complete and original, just the way I like it.
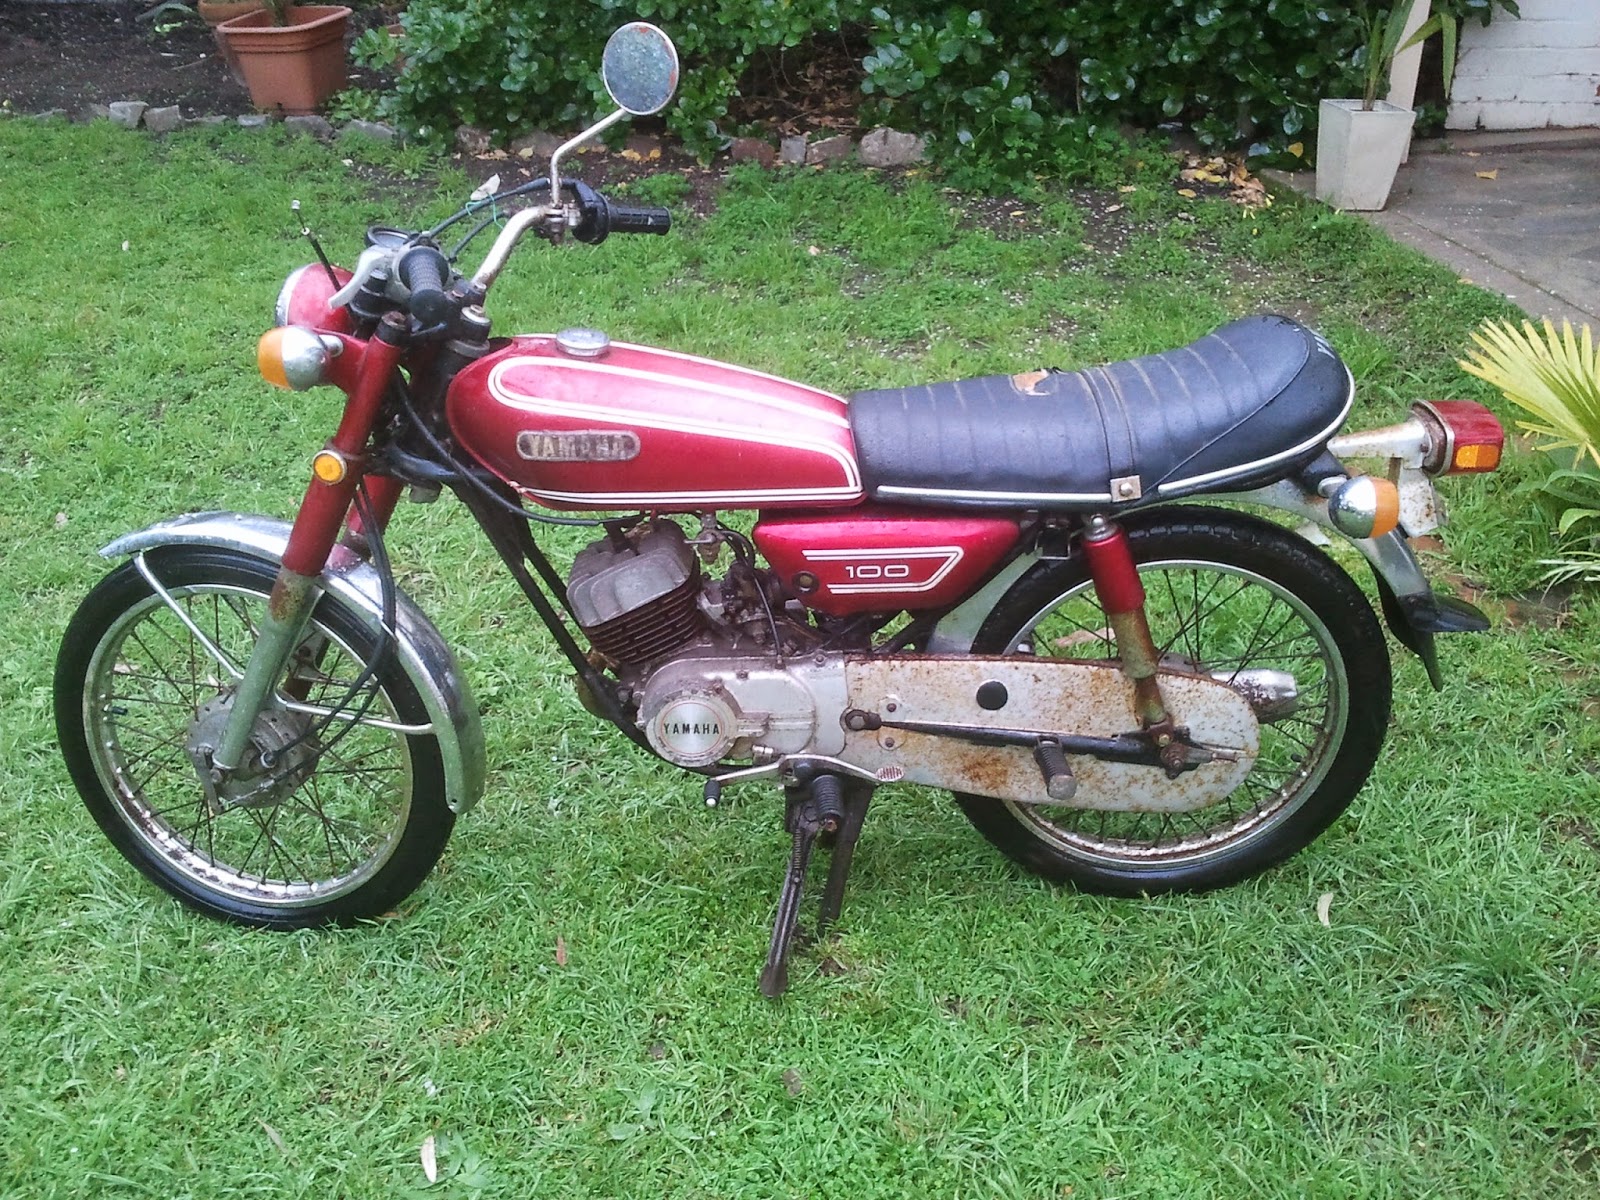
Yamaha LS3 1972
Yamaha LS3 1972

Yamaha LS3 1972
Yamaha LS3 1972

Time for some cleaning and a new ignition switch. The bike was hot wired when I bought it because the previous owner lost the key..

Hot wired Yamaha LS3 1972

There's very little info available about this model. According to info I found on the net Yamaha built this model only in 1972. On the other hand I've seen some of theLS3 models in Thailand from a later year. Anyway, I checked the engine and frame numbers, matching :)

Yamaha LS3 1972 frame number

Yamaha LS3 1972 engine number