Saturday, May 23, 2015

Painting Yamaha Candy Brilliant Red

The original paint of this Yamaha LS3 is Candy Brilliant Red (Yamaha code 0063). But because it was all faded (the top of the tank was getting a bit silver) and rusty I decided to take it back to bare metal and repaint it in it's original colour. The problem with the older Yamaha colours is you cannot simply buy them, even if you have the original colour code. It's a big big secret...
And because it's a candy colour it's even harder to get an exact match. With the brilliant red candy colour you first have to spray the parts with a bright metallic silver. Then you mix a dye with clear coat and put several coats on top of the silver base. With every coat the colour will get a bit darker/deeper.
Spray painting candy colours is a real art and it's very hard to get a nice even coat. If you vary your moving speed or distance while spraying the coat won't be even and you'll get a patchy look. The only solution after a screw up is to bring it back to the primer (Yes, you also have to remove the silver base coat..) and start all over.
With the original paint the pin striping is done by painting the tank white, put on masking tape and then spray the silver and candy. The problem using this system with modern paints is you can get some silver edges/dots when removing the masking tape.

Before I removed all the old paint with paint stripper and a brass wire wheel on the grinder I took lots of pics and measurements of the pinstriping.
I also made a couple of paper templates to make live a bit easier later on :)

Measuring the original fuel tank pin striping

Making the pin striping templates Yamaha 100 cc
Making the pin striping templates

Making the pin striping templates Yamaha LS3 100cc
Making the pin striping templates Yamaha fuel tank

Making the pin striping templates - curves 70's Yamaha
Making the pin striping templates - curves

Back to bare metal.

Using paintstripper to get rid of the old paint - very emotional moment :(

Result after chemical paint stripping - time for the grinder

Result after some grinding with a wire wheel Yamaha fuel tank
Result after some grinding with a brass wire wheel
I also removed the dull oil gauge glass. As I'm gonna buy a new clear one I simply drilled a small hole in the plastic, took a screwdriver and pried it out the oil tank.

Removing the oil gauge glass

Oww, before I took everything back to bare metal I needed to find the exact colour match.  A couple of months ago I bought two NOS shockers in Sweden and they will be used as a colour reference when spraying the Brilliant Red Candy.
Anyway, I took the tank and shockers to my paint supplier and with the help of some colour samples we picked the best colour match.

Selection of the right candy dye Yamaha - DNA Blood Red custom candy
Selection of the right candy dye

I went for the Custom Candy Blood Red dye from DNA. With this dye and a good spray technique it's possible to get an exact colour match. Luckily I've a friend who's a real candy artist.

Here are some pics of the whole painting process.

Fuel tank Yamaha LS3
Fuel tank Yamaha LS3 - filler

Chain case Yamaha LS3 bright silver

Bright silver metallic base coat fuel tank Yamaha 100 LS3
Bright silver metallic base coat

Bright silver metallic base coat Yamaha LS 1972
Bright silver metallic candy base coat 

Brilliant Red Candy - 3 coats - DNA Candy Blood Red
Brilliant Red Candy - after 3 coats.  The first coat looked purple..

3 coats Brilliant Red Candy plus 3 clear coats

3 coats Brilliant Red Candy plus 3 clear coats Yamaha 1972
3 coats Brilliant Red Candy plus 3 clear coats Yamaha LS3 1972

Perfect colour match Candy Brilliant Red - DNA Custom Candy Blood Red - Yamaha 1972
Perfect colour match

Yes, I really love this candy colour! The next morning we rubbed it back for the decals and pin striping. I found 2 side cover decals on EBay,  and for the pin striping I went to a Sign shop who were happy to cut the pinstripes with the right width from the best vinyl available.  Best thing was it was really cheap too :)
I started with the lower straight pin striping part. Be careful not to stretch the vinyl and don't push it to hard on the paint unless you're sure it's in the right position. The glue form the vinyl will soften the paint and it's possible to pull the paint off the tank if you're not careful with it.

Pin striping the Yamaha LS3 fuel tank

Pin striping the Yamaha LS3 fuel tank 1972 - using a template for the curves
Pin striping the Yamaha LS3 fuel tank - using a template for the curves
I found the top pin striping the hardest part, making the right curves and trying not to stretch the vinyl. There are some small imperfections but that will bring it closer to the original pin striping ;) . When I measured the original I found that the left and right side were a bit different, hand labour in the 70's has it's charm.

Original pinstriping finish in the 70's - Yamaha 2 stroke fuel tank
Original pinstriping finish in the 70's
Pin striping the Yamaha LS3 fuel tank - first top line

Pin striping the Yamaha LS3 fuel tank - second top line

Pin striping the Yamaha LS3 fuel tank - half way

Side cover stickers decals Yamaha 100 LS3

Pinstriping all done - ready for some clear coat
Parts - parts - parts
Update 05-06-2015.
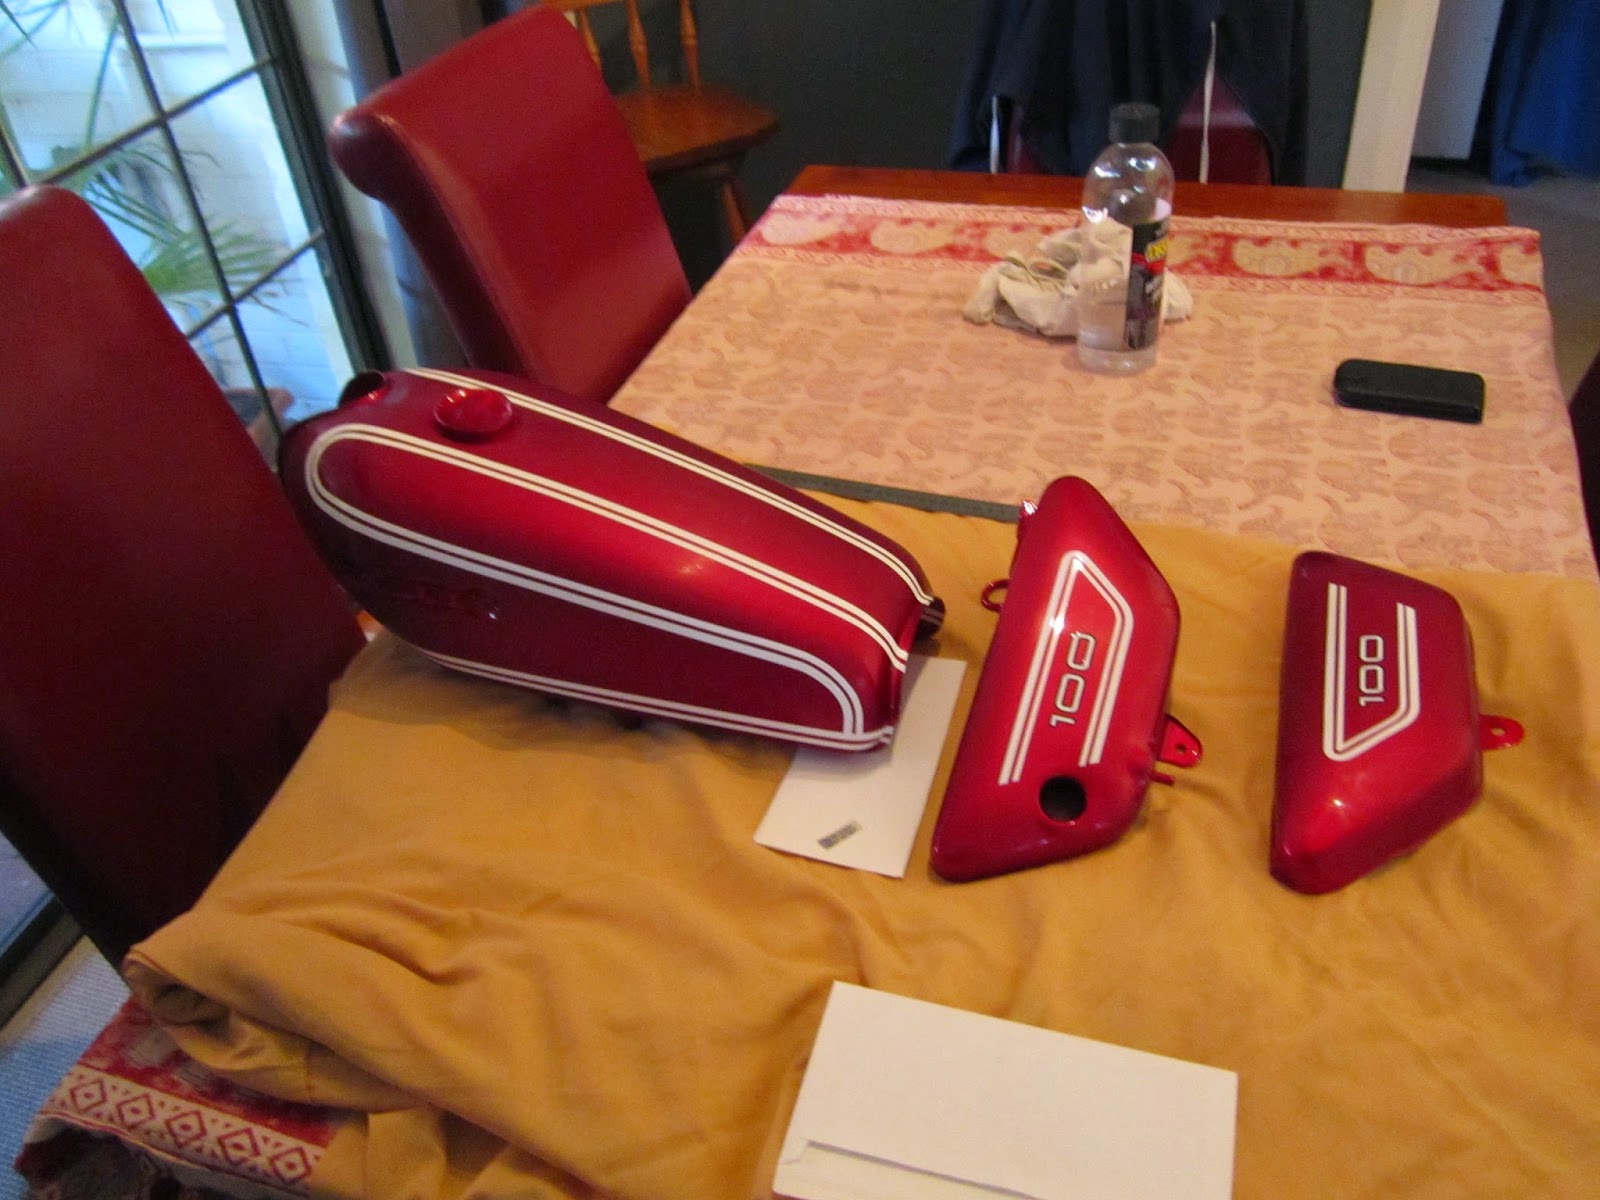
The tank and side cover after 3 clear coats after pinstriping.

Fuel tank Yamaha  Brilliant Red Candy plus 3 clear coats after pinstriping
 Brilliant Red Candy plus 3 clear coats after pinstriping

Fuel tank Yamaha  Brilliant Red Candy plus 3 clear coats after pinstriping
Fuel tank Yamaha 1972 Brilliant Red Candy

Fuel tank and side covers Yamaha LS3 Brilliant Red Candy plus 3 clear coats after pinstriping
Fuel tank and side covers Yamaha 100 LS3 Brilliant Red Candy

Fuel tank Yamaha  Brilliant Red Candy plus 3 clear coats after pinstriping
Fuel tank and side covers Yamaha 1972 Brilliant Red Candy 


Monday, May 11, 2015

Calculating thickness nickel plating

Now the DIY nickel plating is getting better and the plated parts are getting bigger  I had to find out what the thickness of the nickel plating would be after a certain time. According to many sources a thickness of 5 micron (0.005 mm) is the minimum to keep the plated part in a nice condition. To give you an idea about thickness; standard aluminium foil is ca. 16 micron (0.016 mm) thick.

Luckily there's a formula to calculate the thickness of the plating; it is based on Faraday's law 

T = (I*t*A*10000)/(n*F*rho*S)

Is that all??... no worries mate
Is that all??... no worries mate :)
You don't have to understand how and why, just fill out the numbers for your plating recipe :)
  • A = atomic weight of the metal in grams per mole.
  • n = valence of the dissolved metal in solution in equivalents per mole.
  • F = Faraday's constant in coulombs per equivalent. 
  • rho = density in grams per cubic centimeter.
  • S = surface area of the plated part in square centimeters.
  • I = current in coulombs per second.
  • t = time in seconds.
  • T = thickness in microns.
  • in the formula 10,000 is a multiplicative constant to convert centimeters to microns.
Uhh......, OK, most of the needed numbers can be looked up:

Periodic Table of Elements with Valence - Density (rho) - Atomic weight
Periodic Table of Elements with Valence - Density (rho) - Atomic weight- (right click
on the table and open it in a new window to view it full size 100%)

Nickel with Valence - Density (rho) - Atomic weight

F = 96,485.309 coulombs/equivalent. 
A = 58,69 grams per mole (for Nickel)
n = 2 (for Nickel)
rho = 8.908 g/cm3 (for Nickel)
I = depend on the power source you're using. In my case I use a phone charger with a max 350 mA output, and for bigger parts I'm gonna try out a computer adaptor with max 3.4 A output
t = for example 1 minute is 60 seconds, 1 hour is 3600 seconds
S = let's assume the object to be plated is 10 cm long and 10 cm wide => 10*10=100 cm2 

If I leave the object for, lets say 2 hours (7200 seconds) in the electrolyte with the 350mA power source, we'll get the following thickness:

T = (0.350*7200*58.69*10000)/(2*96485.309*8.908*100) 
T= 8.06 micron

If you wanna plate both sides, simply double the time.

So if I leave it for a bit over 2 hours in the solution it should be thick enough. But if you like to polish allot better go for 10-15 micron.

Another important thing:
To calculate the thickness, use the Current (I) you directly measure in the circuit between the pos (+) and Cathode!!! It will be different then what you read on the charger (which is the max current).

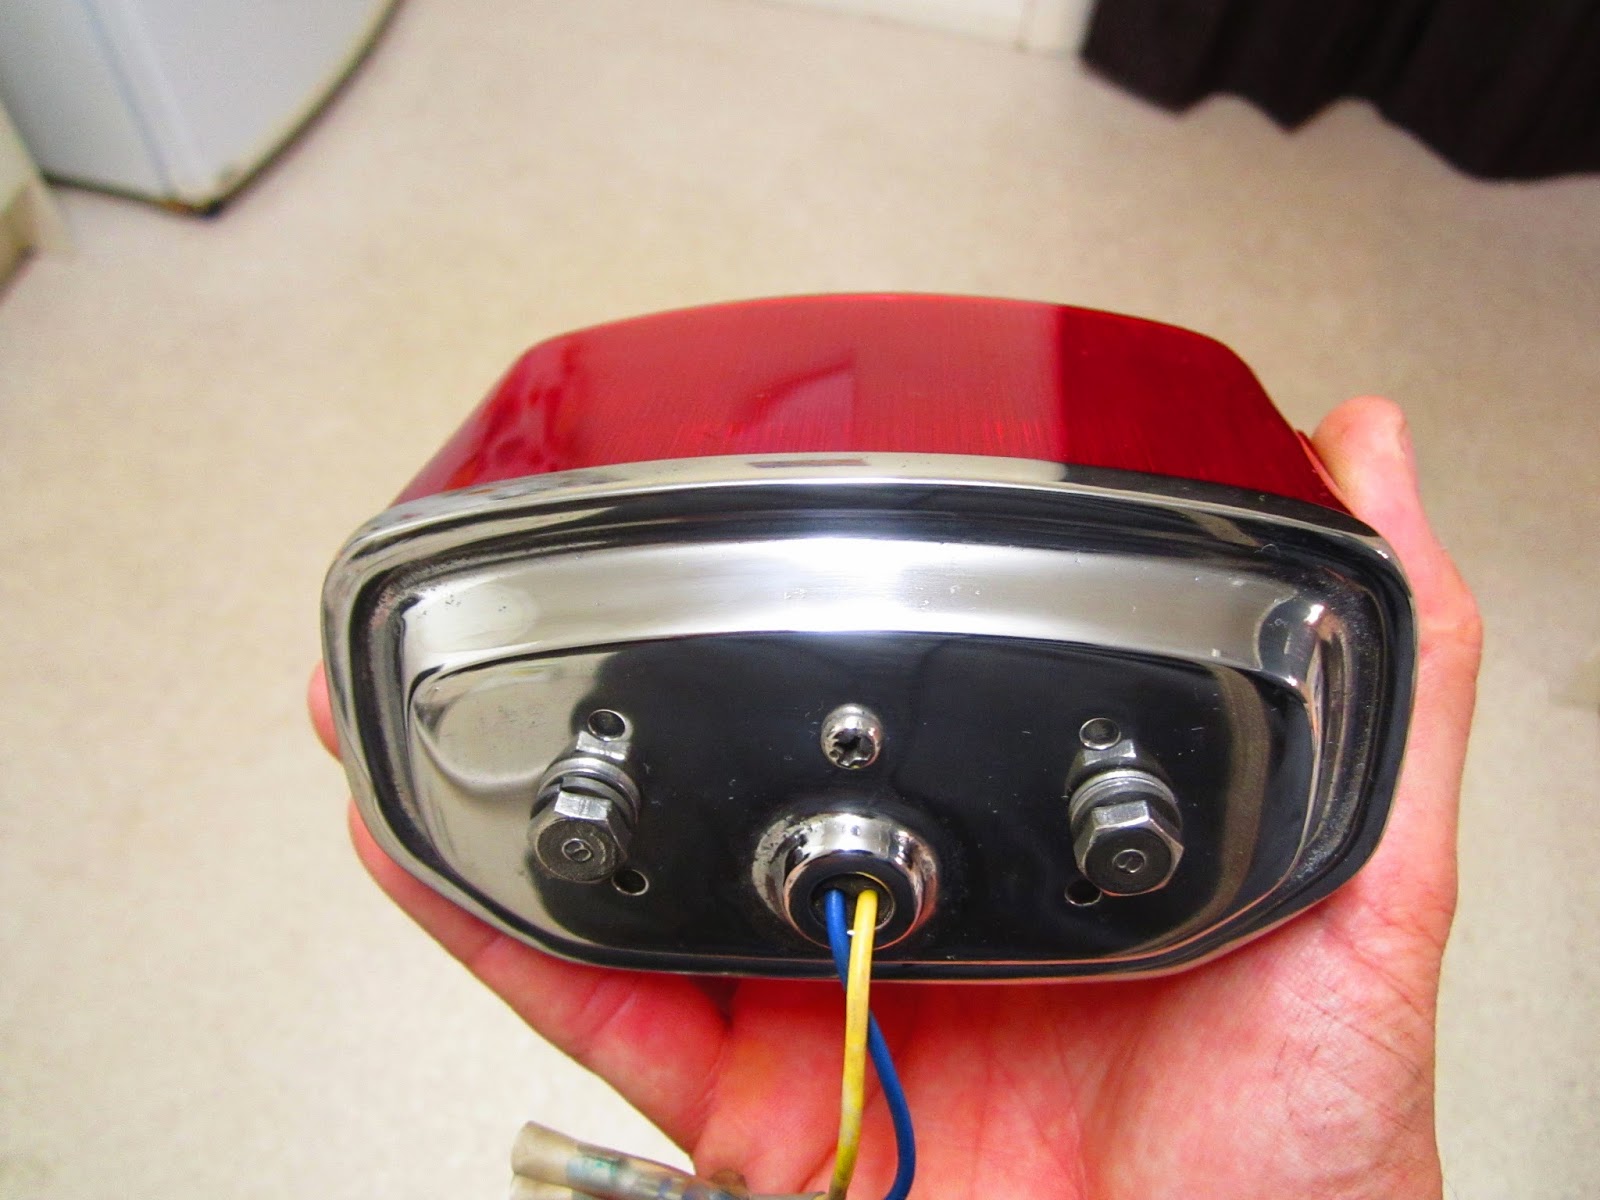
I still had to sand and plate the Yamaha tail light. It was in really bad shape as you can see on the pics.
After a couple of hours it was smooth enough (grit 2000). If you do a really good sanding job it should look almost the same as a plated part. The hardest part was the groove. I couldn't get it super smooth but the tail light is looking way better then before. Another "problem" was that it couldn't be totally dipped in acid because of the mirror bowl.  Anyway... after using Faraday's law I choose for a bit over 3 hours plating with the 350 mA phone charger. That should be enough time to give it a thickness of around 15 um.

Rusty taillight Yamaha LS3 1972
Rusted taillight Yamaha LS3 1972

Rusted taillight Yamaha 100 LS3 1972
Rusted taillight Yamaha LS3 

Pitted taillight Yamaha 100 LS3 1972
Pitted taillight Yamaha LS3 1972

Pitted taillight Yamaha 100 LS3
Pitted taillight Yamaha LS3

Taillight Yamaha LS3 after sanding, before plating
Sanded taillight Yamaha LS3

Plating taillight Yamaha LS3 for over 3 hours

Nickel plated taillight Yamaha LS3 1972
Nickel plated taillight Yamaha LS3

Thursday, April 23, 2015

Brazing fuel tank and fork ears

When I took of some paint and rust I discovered two pinholes in the fuel tank. The rest of the tank was in good condition. It's just the part where the seat meets the tank that was rusted. Same thing with one of the fork ears, 3 small holes on the inside.

Pinholes in Yamaha Fuel tank Yamaha 100cc
Pinholes in Yamaha Fuel tank

Time for some brazing!
I used brazing rods containing 5% silver.
Melting point of those brazing rods is around 650° Celcius, melting point of mild steel is around 1450°-1550° Celcius. The difference with welding is that the braze alloy and steel won't fuse/melt together but will bond like glue, the braze alloy works like a filler. You could also try to weld it but I find brazing easier and the change of warping is less than with welding. I used a simple and cheap propane torch, as long a you braze pinholes it will work.

Brazing rod and flux - brazing pinholes fuel tank
Brazing rod, propane torch and flux
Before you start brazing, make sure the tank is completely empty. My fuel tank has been empty for 4 months or so, so I blew some compressed air through it to get rid of the last fumes.
First you have to heat the area you want to braze till it's red hot. Then add some brazing flux, let it turn brownish and press the rod on the hot spot. The trick is to melt the brazing rod with the heat of the part you want to braze instead of melting it with the torch flame.


Brazing pinholes Fuel tank Yamaha LS3

Brazed pinholes Fuel tank Yamaha LS3

Brazed holes lamp ear front fork

After brazing the holes I sanded it back with 80-120-240-360 grit.
The rest of the rust pits I'll fill with JB Weld or some other filler.

Brazed pinholes fuel tank Yamaha 100 LS3 1972
Brazed pinholes fuel tank Yamaha LS3 1972

Brazing holes in lamp ear  front fork Yamaha 100 LS3
Brazing holes in lamp ear  front fork Yamaha LS3
To make sure the tank wasn't leaking anymore, I filled it with water and waited for an hour or so. No leaks!

Leak test brazed fuel tank Yamaha 100 1972
Leak test brazed fuel tank Yamaha
After the test I used a paint stripper (on low!!) to get rid of the last bits of water drops in the fuel tank.

Drying Fuel tank Yamaha LS3 1972

There was also a nasty dent in the exhaust. As trhe dent wasn't too big I filled it with silver solder. Make sure it's thick enough so when you sand it back it will be smooth and flush with the exhaust.

Dented Exhaust Yamaha LS3 2 stroke
Dented Exhaust Yamaha LS3

Brazing dent in exhaust Yamaha LS3

Brazing dent in exhaust Yamaha 100 LS3
Brazed dent in exhaust Yamaha LS3

Smoking hot muffler Yamaha 100 LS3
Smoking hot

Brazed and sanded exhaust Yamaha 100cc
Brazed and sanded 

Next thing to do is strip back the fuel tank to bare metal for painting.

Saturday, April 4, 2015

Removing and fitting front fork seals

Because the old original front fork seals were leaking I bought a couple of new ones. The only problem was how to remove the old fork seals.
The seals are hidden in the so called "outer nuts".

Outer nut front fork seal Yamaha LS3 1972
Outer nut front fork Yamaha LS3 1972

You cannot simply push them out because there's a thread on the other side of the outer nut.
So I took a big washer, shaved it a bit so it was just small enough to pass the threaded part and big enough to lay on top (actually it's the bottom...) of the old seal.

Then I took a threaded rod, a 36 mm socket and a smaller socket that fitted in the 36 mm socket a big washer and 2 nuts. Spray some WD40 on the edge of the old seal, hold one nut with a vise grip and start turning the other nut. The old seal will come out nicely without scratching the inside of the outer nut.

Seal removal front fork Yamaha LS3 1972

Seal removal tool front fork Yamaha LS3 1972
Seal removal front fork Yamaha LS3 1972

Seal removal front fork Yamaha LS3 1972
Seal removed front fork Yamaha LS3 1972

After nickel plating the outer nut I treated the inside with fish oil to prevent further rusting. Next thing was fitting the new seal. I used almost the same tools as mentioned above.

Inside the outer nut front fork Yamaha LS3
Inside the outer nut

Fish oil treatment

Fitting new fork seal Yamaha LS3

Saturday, March 28, 2015

Preparation motorcycle parts before DIY plating


Preparation is the most important step in the whole nickel plating process. If you want high quality plating almost all the sanding, buffing and polishing is done before plating. After lots of trial and error I finally found a good way to prepare the bolts and other parts of the bike.

Original bolt before preparation and plating

1.Get rid of the major pitting.

I used the bench grinder to carefully shave off a thin layer. If the pitting is really bad/deep it maybe better to start with a new bolt from your local hardware store and turn this one into an "original" bolt.

Removing pitted top layer motorcycle bolt
If you have a bigger part that's pitted you can also use a belt sander. I used it to get rid of the major pitting of the down pipe of my Yamaha 100 LS3.

Rusted downpipe Yamaha 100 LS3
Rusted down pipe Yamaha 100 LS3
Rusted downpipe Yamaha 100 LS3
Rusted down pipe Yamaha 100 LS3
Rusted front fork Yamaha LS3 1972
Rusted front fork Yamaha LS3
Belt sander used to remove pitting from downpipe
Belt sander used to remove pitting from down pipe

2.Get rid of the existing plating.

Zinc plated items can be pickled in hydrochloric acid, but chrome plated items are a bit harder to de-chrome. You can try it by sanding or grinding but also with electrolysis. You need a plastic tub big enough for your item, a couple of metal rods or plates, copper wire, carbonate/washing soda, water and a battery charger. I put the four metal rods in the corners of the tub and connected them with the copper wire. Then I filled the tub with water and mixed ca. 500-750 gram washing soda in it (the more the better ;). In the middle of the tub I put a metal rod so the bolts can be connected with copper wire. Make sure the copper wire from the neg (black -) doesn't touch the pos (red +) rod hanging over the tube. I played it safe with some ductape. Now connect the battery charger and switch on the power. You'll see the items hanging on the pos(red +) rod will start bubbling. It will take a couple of hours or maybe a day (depending on the type of battery charger) to remove the chrome plating. It won't damage the bare metal parts. I also tried baking soda but I think washing soda works better.
As soon as you switch on the power the solution turns green.

Remove chrome plating with washing soda

Underneath the chrome plating you'll find nickel or copper plating (with most parts). If you give this a good pickle there's not always a need to remove this layer as well. However, if you also want to remove the nickel layer (plating over bare metal is always better..) I use the following recipe:

Take a plastic or glass tub and make a solution  water and hydrochloric acid. Add 30 ml (30%) hydrochloric acid for each Litre of water.
Grab a piece of pure lead and hang it into the solution. Connect the Neg (black -) with the lead Cathode and the Pos (Red +) with your item. Within 1 hour all the nickel will come of like aluminium foil. For the lead Cathode I used bead sinkers for fishing and made a "necklace" with copper wire.
Don't leave your part to long in the solution as it will result in pitting of your metal part. Try to keep the current low to avoid quick pitting. An old laptop charger will work better than a car battery charger.

Be careful with all those chemicals . Wear gloves, goggles and a mask. No responsibility accepted.

Tip: If you need to remove some rust, just swap the pos and neg wire of the washing soda solution.


Removing Chrome plating with electrolysis
Get rid of the old chrome plating
Initial set up -removing nickel plating

Half of the nickel plating removed (took ca. 20 minutes),
I turned the fork 180 degrees to remove the other half

Because the neg wire got very hot (with the car battery charger
 I used a piece of wood as insulator for the plastic tub

removing old nickel plating from headlight bezel with lead cathode

3. Sanding

If you want a high quality mirror like finish you have to sand your part. If it's still really pitted, start with grit 80, then 120-240-360-400-600-800-1000-1200-1500-2000. That's what I did with the rust pitted down pipe and all the pitted bolt heads. It took my a couple of hours to get  a mirror finish on the down pipe. There were still a couple of pits, but sanding them down would make the metal very thin, so I just sanded the sharp edges off.

4. Acid Pickle

After everything is really smooth and shiny I dip the parts in Hydrochloric acid for a couple of minutes. Then rinse with water and dip the parts in Deox-Ionize, a sulphuric acid. After the acid dipping rinse well with water and wipe the object with wax and grease remover, connect it to the copper wires and put it in the nickel electrolyte. All these steps have to be done as quickly as possible to prevent flash rust.
BTW: Never try to pickle cast iron!!  It's porous and you'll never be able to get rid of the acid which will eat it's way trough the cast iron part and eventually destroy it.
Also; don't store your acid inside the shed. Even if it's in a locked container it will get in the air and attack every metal part in your shed.

5 Start plating

Now you can start nickel plating. Smaller parts, like bolts, can be plated in 60 minutes. For bigger parts like the down pipe I go for 90 minutes. If you want you can also plate the bolts for 90 minutes, this will give a  them a thicker layer of nickel. Parts with a bigger surface need some extra time because the same current has to cover a bigger area. If you want to calculate the plating thickness see http://yamaha-ls3.blogspot.com.au/2015/05/calculating-thickness-nickel-plating.html

Yamaha LS3 downpipe after nickel plating
Yamaha LS3 down pipe after plating

Yamaha LS3 downpipe after plating
Yamaha LS3 down pipe after nickel plating
As vintage (I mean very vintage ;)) exhausts used to have a nickel plated finish I'm not to worried about not having the chrome plating on top.
Btw; did you know that the famous Rickman frames were nickel plated ?

6. Buffing and polishing

Right after you take out the parts of the electrolyte, rinse them with water and polish them by hand or with a bench buffer/polisher. Otherwise the surface will turn dull within a couple of minutes.

7. Treating with A-Glaze

To prevent the nickel plated parts from oxidizing I treat them with A Glaze. This will last for a least 5 years. I'm not sure if the A Glaze can handle the heat from the exhaust so I left the down pipe as it was.

DIY Nickel plated front forks Yamaha LS3

Original bolts after preparation and nickel plating