Thursday, April 23, 2015

Brazing fuel tank and fork ears

When I took of some paint and rust I discovered two pinholes in the fuel tank. The rest of the tank was in good condition. It's just the part where the seat meets the tank that was rusted. Same thing with one of the fork ears, 3 small holes on the inside.

Pinholes in Yamaha Fuel tank Yamaha 100cc
Pinholes in Yamaha Fuel tank

Time for some brazing!
I used brazing rods containing 5% silver.
Melting point of those brazing rods is around 650° Celcius, melting point of mild steel is around 1450°-1550° Celcius. The difference with welding is that the braze alloy and steel won't fuse/melt together but will bond like glue, the braze alloy works like a filler. You could also try to weld it but I find brazing easier and the change of warping is less than with welding. I used a simple and cheap propane torch, as long a you braze pinholes it will work.

Brazing rod and flux - brazing pinholes fuel tank
Brazing rod, propane torch and flux
Before you start brazing, make sure the tank is completely empty. My fuel tank has been empty for 4 months or so, so I blew some compressed air through it to get rid of the last fumes.
First you have to heat the area you want to braze till it's red hot. Then add some brazing flux, let it turn brownish and press the rod on the hot spot. The trick is to melt the brazing rod with the heat of the part you want to braze instead of melting it with the torch flame.


Brazing pinholes Fuel tank Yamaha LS3

Brazed pinholes Fuel tank Yamaha LS3

Brazed holes lamp ear front fork

After brazing the holes I sanded it back with 80-120-240-360 grit.
The rest of the rust pits I'll fill with JB Weld or some other filler.

Brazed pinholes fuel tank Yamaha 100 LS3 1972
Brazed pinholes fuel tank Yamaha LS3 1972

Brazing holes in lamp ear  front fork Yamaha 100 LS3
Brazing holes in lamp ear  front fork Yamaha LS3
To make sure the tank wasn't leaking anymore, I filled it with water and waited for an hour or so. No leaks!

Leak test brazed fuel tank Yamaha 100 1972
Leak test brazed fuel tank Yamaha
After the test I used a paint stripper (on low!!) to get rid of the last bits of water drops in the fuel tank.

Drying Fuel tank Yamaha LS3 1972

There was also a nasty dent in the exhaust. As trhe dent wasn't too big I filled it with silver solder. Make sure it's thick enough so when you sand it back it will be smooth and flush with the exhaust.

Dented Exhaust Yamaha LS3 2 stroke
Dented Exhaust Yamaha LS3

Brazing dent in exhaust Yamaha LS3

Brazing dent in exhaust Yamaha 100 LS3
Brazed dent in exhaust Yamaha LS3

Smoking hot muffler Yamaha 100 LS3
Smoking hot

Brazed and sanded exhaust Yamaha 100cc
Brazed and sanded 

Next thing to do is strip back the fuel tank to bare metal for painting.

Saturday, April 4, 2015

Removing and fitting front fork seals

Because the old original front fork seals were leaking I bought a couple of new ones. The only problem was how to remove the old fork seals.
The seals are hidden in the so called "outer nuts".

Outer nut front fork seal Yamaha LS3 1972
Outer nut front fork Yamaha LS3 1972

You cannot simply push them out because there's a thread on the other side of the outer nut.
So I took a big washer, shaved it a bit so it was just small enough to pass the threaded part and big enough to lay on top (actually it's the bottom...) of the old seal.

Then I took a threaded rod, a 36 mm socket and a smaller socket that fitted in the 36 mm socket a big washer and 2 nuts. Spray some WD40 on the edge of the old seal, hold one nut with a vise grip and start turning the other nut. The old seal will come out nicely without scratching the inside of the outer nut.

Seal removal front fork Yamaha LS3 1972

Seal removal tool front fork Yamaha LS3 1972
Seal removal front fork Yamaha LS3 1972

Seal removal front fork Yamaha LS3 1972
Seal removed front fork Yamaha LS3 1972

After nickel plating the outer nut I treated the inside with fish oil to prevent further rusting. Next thing was fitting the new seal. I used almost the same tools as mentioned above.

Inside the outer nut front fork Yamaha LS3
Inside the outer nut

Fish oil treatment

Fitting new fork seal Yamaha LS3

Saturday, March 28, 2015

Preparation motorcycle parts before DIY plating


Preparation is the most important step in the whole nickel plating process. If you want high quality plating almost all the sanding, buffing and polishing is done before plating. After lots of trial and error I finally found a good way to prepare the bolts and other parts of the bike.

Original bolt before preparation and plating

1.Get rid of the major pitting.

I used the bench grinder to carefully shave off a thin layer. If the pitting is really bad/deep it maybe better to start with a new bolt from your local hardware store and turn this one into an "original" bolt.

Removing pitted top layer motorcycle bolt
If you have a bigger part that's pitted you can also use a belt sander. I used it to get rid of the major pitting of the down pipe of my Yamaha 100 LS3.

Rusted downpipe Yamaha 100 LS3
Rusted down pipe Yamaha 100 LS3
Rusted downpipe Yamaha 100 LS3
Rusted down pipe Yamaha 100 LS3
Rusted front fork Yamaha LS3 1972
Rusted front fork Yamaha LS3
Belt sander used to remove pitting from downpipe
Belt sander used to remove pitting from down pipe

2.Get rid of the existing plating.

Zinc plated items can be pickled in hydrochloric acid, but chrome plated items are a bit harder to de-chrome. You can try it by sanding or grinding but also with electrolysis. You need a plastic tub big enough for your item, a couple of metal rods or plates, copper wire, carbonate/washing soda, water and a battery charger. I put the four metal rods in the corners of the tub and connected them with the copper wire. Then I filled the tub with water and mixed ca. 500-750 gram washing soda in it (the more the better ;). In the middle of the tub I put a metal rod so the bolts can be connected with copper wire. Make sure the copper wire from the neg (black -) doesn't touch the pos (red +) rod hanging over the tube. I played it safe with some ductape. Now connect the battery charger and switch on the power. You'll see the items hanging on the pos(red +) rod will start bubbling. It will take a couple of hours or maybe a day (depending on the type of battery charger) to remove the chrome plating. It won't damage the bare metal parts. I also tried baking soda but I think washing soda works better.
As soon as you switch on the power the solution turns green.

Remove chrome plating with washing soda

Underneath the chrome plating you'll find nickel or copper plating (with most parts). If you give this a good pickle there's not always a need to remove this layer as well. However, if you also want to remove the nickel layer (plating over bare metal is always better..) I use the following recipe:

Take a plastic or glass tub and make a solution  water and hydrochloric acid. Add 30 ml (30%) hydrochloric acid for each Litre of water.
Grab a piece of pure lead and hang it into the solution. Connect the Neg (black -) with the lead Cathode and the Pos (Red +) with your item. Within 1 hour all the nickel will come of like aluminium foil. For the lead Cathode I used bead sinkers for fishing and made a "necklace" with copper wire.
Don't leave your part to long in the solution as it will result in pitting of your metal part. Try to keep the current low to avoid quick pitting. An old laptop charger will work better than a car battery charger.

Be careful with all those chemicals . Wear gloves, goggles and a mask. No responsibility accepted.

Tip: If you need to remove some rust, just swap the pos and neg wire of the washing soda solution.


Removing Chrome plating with electrolysis
Get rid of the old chrome plating
Initial set up -removing nickel plating

Half of the nickel plating removed (took ca. 20 minutes),
I turned the fork 180 degrees to remove the other half

Because the neg wire got very hot (with the car battery charger
 I used a piece of wood as insulator for the plastic tub

removing old nickel plating from headlight bezel with lead cathode

3. Sanding

If you want a high quality mirror like finish you have to sand your part. If it's still really pitted, start with grit 80, then 120-240-360-400-600-800-1000-1200-1500-2000. That's what I did with the rust pitted down pipe and all the pitted bolt heads. It took my a couple of hours to get  a mirror finish on the down pipe. There were still a couple of pits, but sanding them down would make the metal very thin, so I just sanded the sharp edges off.

4. Acid Pickle

After everything is really smooth and shiny I dip the parts in Hydrochloric acid for a couple of minutes. Then rinse with water and dip the parts in Deox-Ionize, a sulphuric acid. After the acid dipping rinse well with water and wipe the object with wax and grease remover, connect it to the copper wires and put it in the nickel electrolyte. All these steps have to be done as quickly as possible to prevent flash rust.
BTW: Never try to pickle cast iron!!  It's porous and you'll never be able to get rid of the acid which will eat it's way trough the cast iron part and eventually destroy it.
Also; don't store your acid inside the shed. Even if it's in a locked container it will get in the air and attack every metal part in your shed.

5 Start plating

Now you can start nickel plating. Smaller parts, like bolts, can be plated in 60 minutes. For bigger parts like the down pipe I go for 90 minutes. If you want you can also plate the bolts for 90 minutes, this will give a  them a thicker layer of nickel. Parts with a bigger surface need some extra time because the same current has to cover a bigger area. If you want to calculate the plating thickness see http://yamaha-ls3.blogspot.com.au/2015/05/calculating-thickness-nickel-plating.html

Yamaha LS3 downpipe after nickel plating
Yamaha LS3 down pipe after plating

Yamaha LS3 downpipe after plating
Yamaha LS3 down pipe after nickel plating
As vintage (I mean very vintage ;)) exhausts used to have a nickel plated finish I'm not to worried about not having the chrome plating on top.
Btw; did you know that the famous Rickman frames were nickel plated ?

6. Buffing and polishing

Right after you take out the parts of the electrolyte, rinse them with water and polish them by hand or with a bench buffer/polisher. Otherwise the surface will turn dull within a couple of minutes.

7. Treating with A-Glaze

To prevent the nickel plated parts from oxidizing I treat them with A Glaze. This will last for a least 5 years. I'm not sure if the A Glaze can handle the heat from the exhaust so I left the down pipe as it was.

DIY Nickel plated front forks Yamaha LS3

Original bolts after preparation and nickel plating

Saturday, February 21, 2015

Rebuilding front wheel Yamaha LS3

The original brake shoe plate of the front wheel had a broken cable holder that was glued together a long time ago. When I tried to take the cable adjuster out, the holder fell apart.

Old broken brake shoe plate Yamaha LS3

I could try to repair ir but I found a nice cheap NOS one on Ebay.
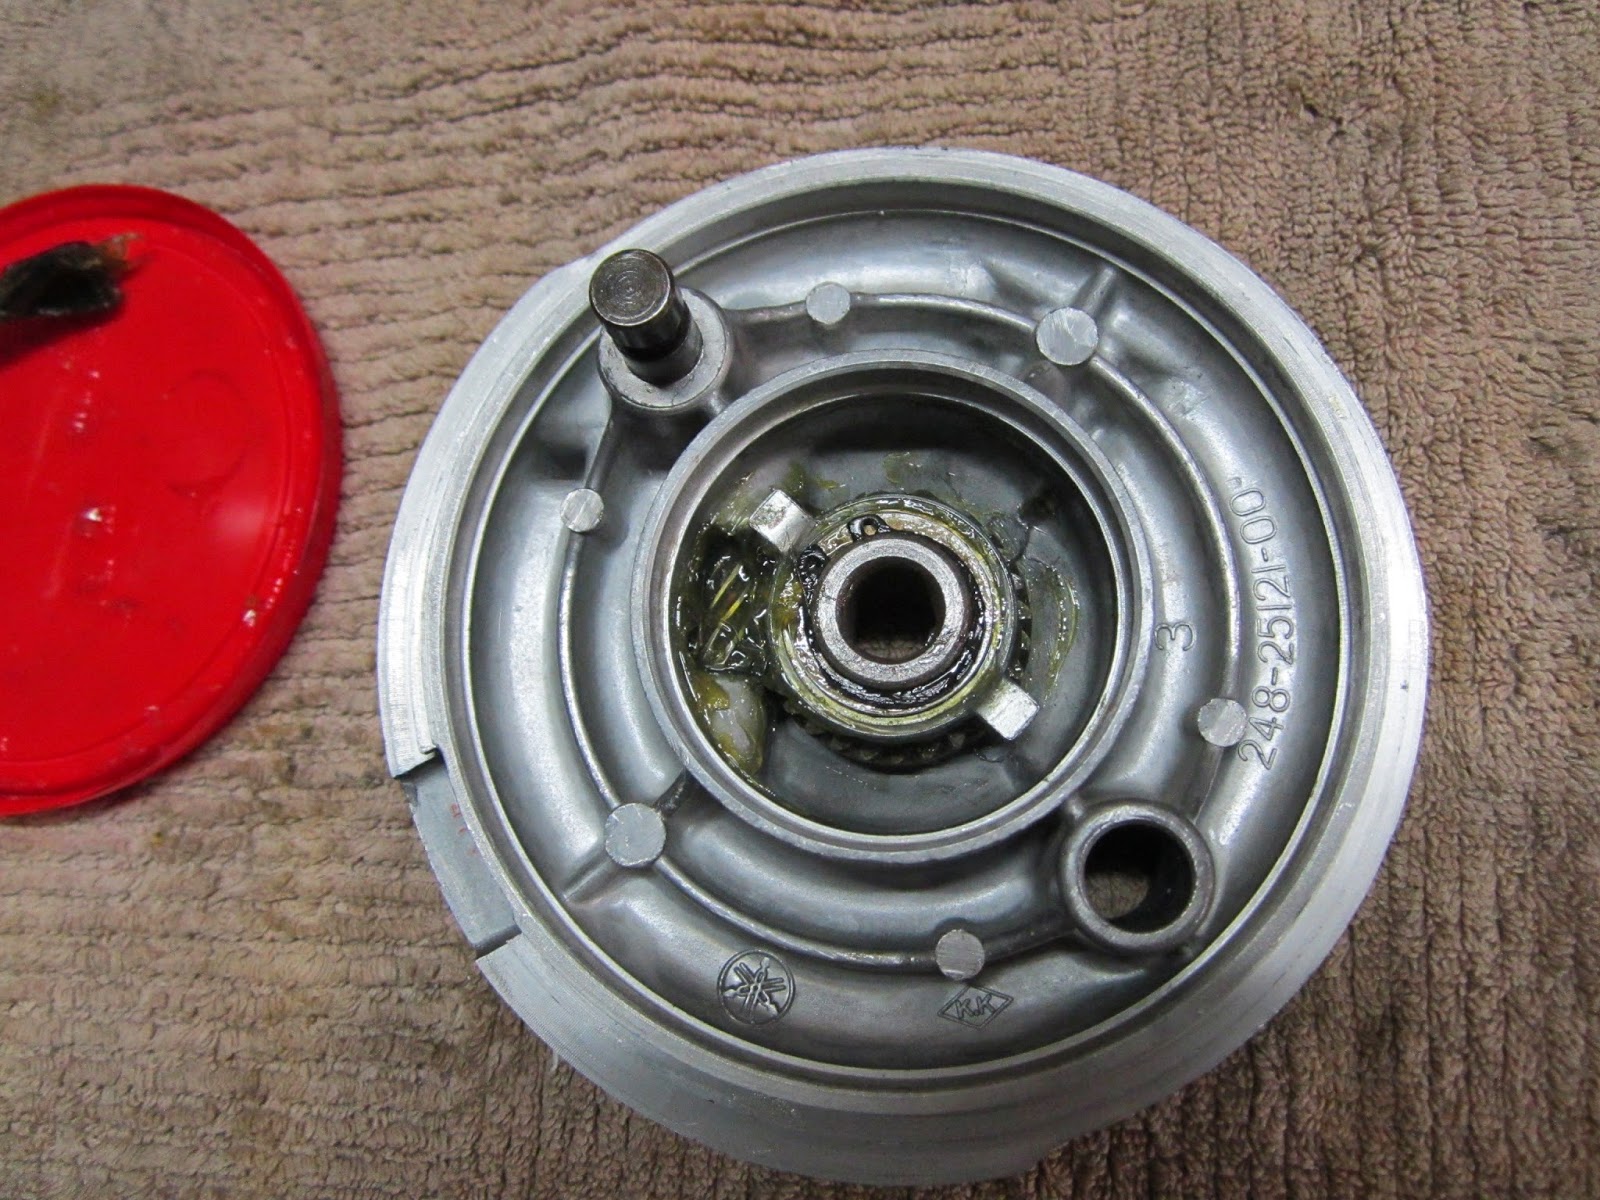
All the parts inside the old brake shoe plate were still in good nick, so all I had to do was take it out and fit it into the new NOS brake plate.

Speedo gear inside brake shoe plate Yamaha 100 LS3
Speedo gear inside brake shoe plate

After removing the brake shoes and brake camshaft I took a nice round spanner and carefully pried out the seal.

Removing the seal inside the brake shoe plate

After that it was a matter of removing the circlip and you can take almost everything out.

Exploded view of parts inside brake shoe plate

Almost, there is one thing you need a special tool for and that's the speedo gear. It's screwed deep inside the brake plate and you cannot remove it with a screwdriver or "normal"socket.

Gear speedo meter Yamaha LS3

As I didn't have the "special" Yamaha tool I made one myself. A 32/17 socket fits perfectly in the opening, so I took one from an elcheapo set I had lying around, took some measurements, put it in the vice and shaped it so it would fit in the gear's bushing.

Tool to remove speedo gear inside brake plate

Another exploded view of parts inside brake shoe plate Yamaha 100
Another exploded view of parts inside brake shoe plate
Before I put everything back in the new brake shoe plate I gave it, and the rest of the hub, a nice good buff.

Polished hub and brake shoe plate Yamaha LS3 1972
Polished hub and brake shoe plate Yamaha LS3

Greasing the speedo gear

Speedo parts back in place

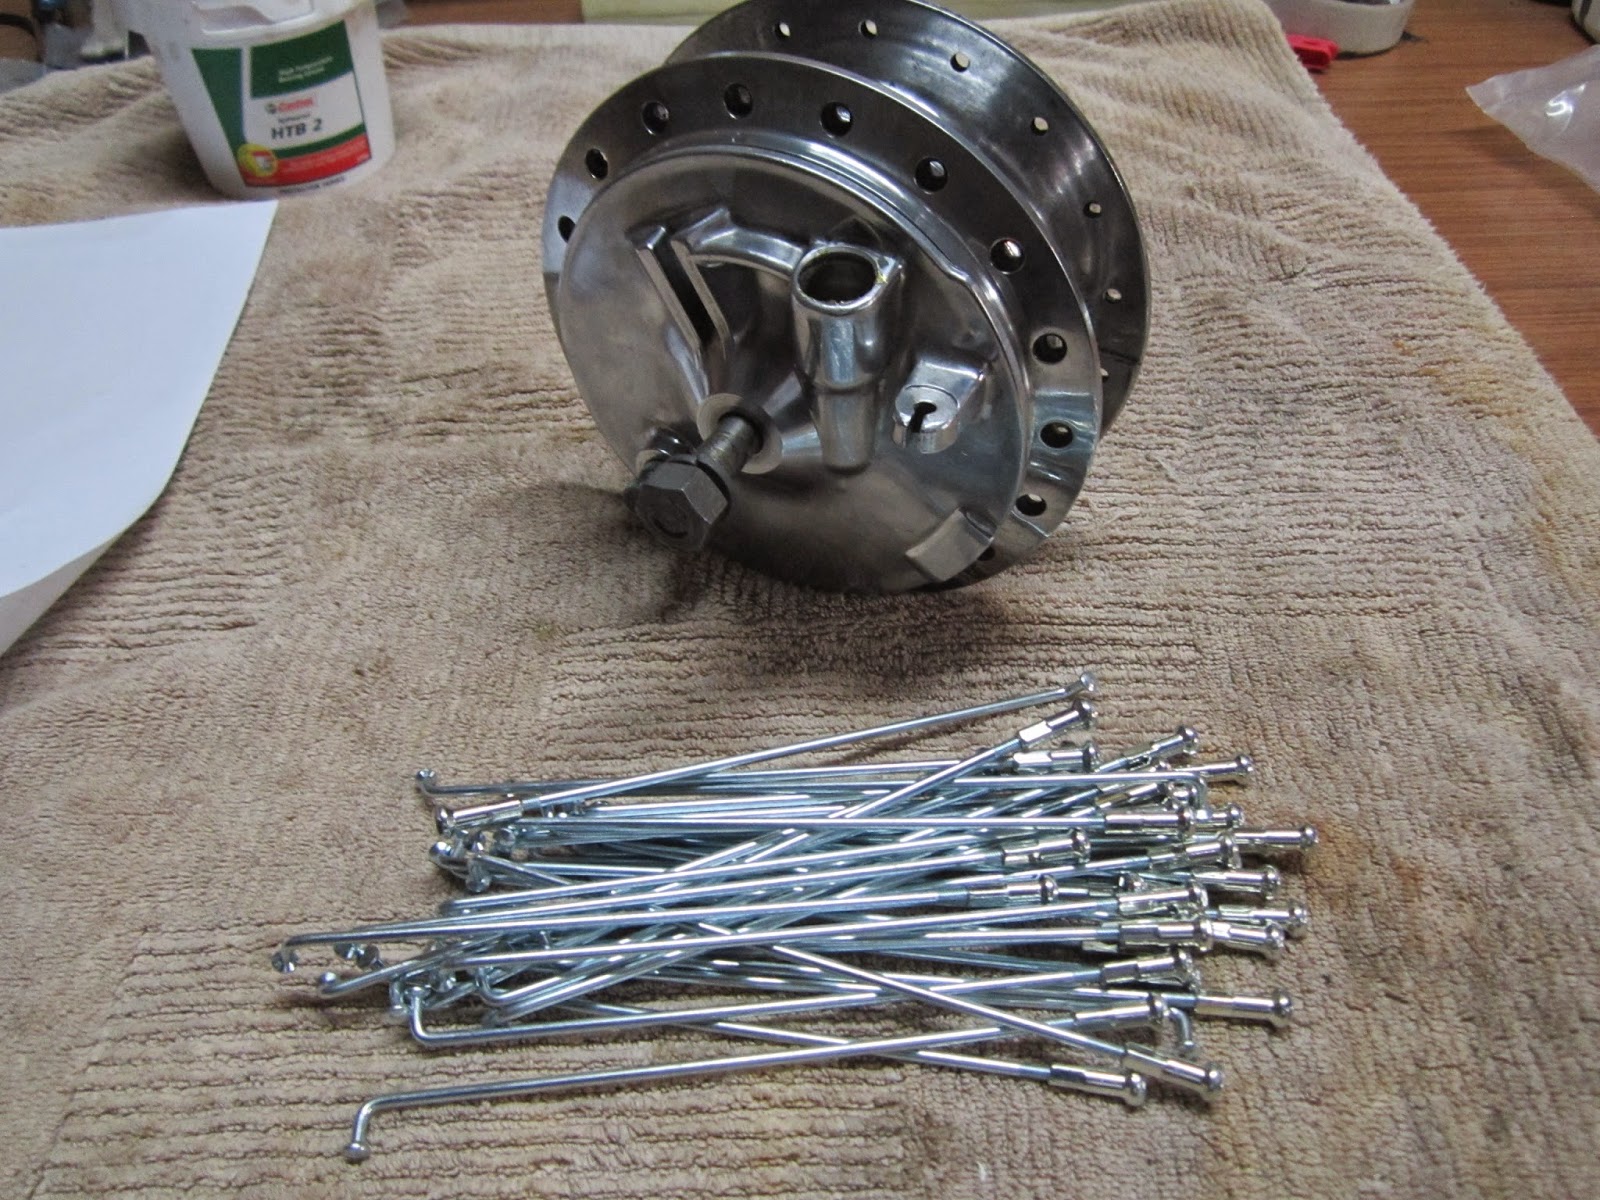
Hub front wheel Yamaha LS3

Time for some lacing. See for how to:
http://yamaha-ls3.blogspot.com.au/2015/01/rebuilding-and-lacing-wheels.html

Spokes and hub front wheel Yamaha
Spokes and hub front wheel

With the new rim and spokes the shaft and metal dust cover looked really dull and tired so cleaned them and gave 'm a new shiny coat of nickel.

Nickel plated shaft and dust cover front wheel Yamaha LS3

Front wheel and shaft Yamaha LS3

Front wheel and shaft Yamaha LS3

Rebuild Front wheel Yamaha LS3

Rebuild Front wheel Yamaha LS3 100cc
Rebuild Front wheel Yamaha LS3