Tuesday, July 7, 2015

Fixing the front fork

When I took the front fork legs apart there wasn't much oil in them anymore. One of the inner tubes was in good (pit-less) condition but the other one was pitted badly.

Yamaha LS3 rusty front fork
Pitted inner tube front fork Yamaha

I asked around but there wasn't anybody who could repair it.  Luckily the inner tubes of the Yamaha LS3 aren't visible so I decided to fill the pitted parts with JB Weld. It's very strong, smooth and chemical (oil) resistant. If you don't fix the pitted surface your new oil seal will be gone within a couple of days...

Fixing inner tube front fork with JB Weld

It took a while before it was really cured, so I sanded it after a week up to grid 1500.
Another issue which had to be be solved were the old leaky fork seals. They're sitting inside the so called "outer nuts". With a home made tool I took the old ones out, see http://yamaha-ls3.blogspot.com.au/2015/04/removing-front-fork-seals.html Inside the outer nut is also an O-ring hidden in a groove. Don't forget to replace them as well.

One of the outer nuts was too damaged to fix so I bought a new one at www.cmsnl.com . The new fork seal is already fitted in the outer nut, but the O-ring isn't, so make sure you put one in. The rest of the old chrome work was stripped back, sanded and DIY nickel plated.

When I wanted to put all the parts back together the inner tube top bolts both got jammed, but a M10-1.25 tap cleaned the threads out and with some copper grease it was all good.

Cleaning inner fork tube thread with M10 - 1.25 tap

Cleaning "harvest" after chasing the threads

With a longer bolt I pulled the inner tubes all the way up in the triple tree and tightened the securing bolts. Make sure they are both all the way up otherwise you'll get weird things..

Most parts of a Yamaha LS3 front fork leg

Assembly of Yamaha front fork
Assembly of the front fork

According to the Service data in the LS3 Manual each leg needs 147 cc Yamaha Gear Oil. I used Castrol 15W fork oil.

Castrol 15W front fork oil Yamaha Ls3
Castrol 15W front fork oil

Filling the legs with fork oil

Almost done

Sandy guarding the bike
Sandy loves the bike

Sunday, June 28, 2015

Cleaning carburettor Yamaha LS3

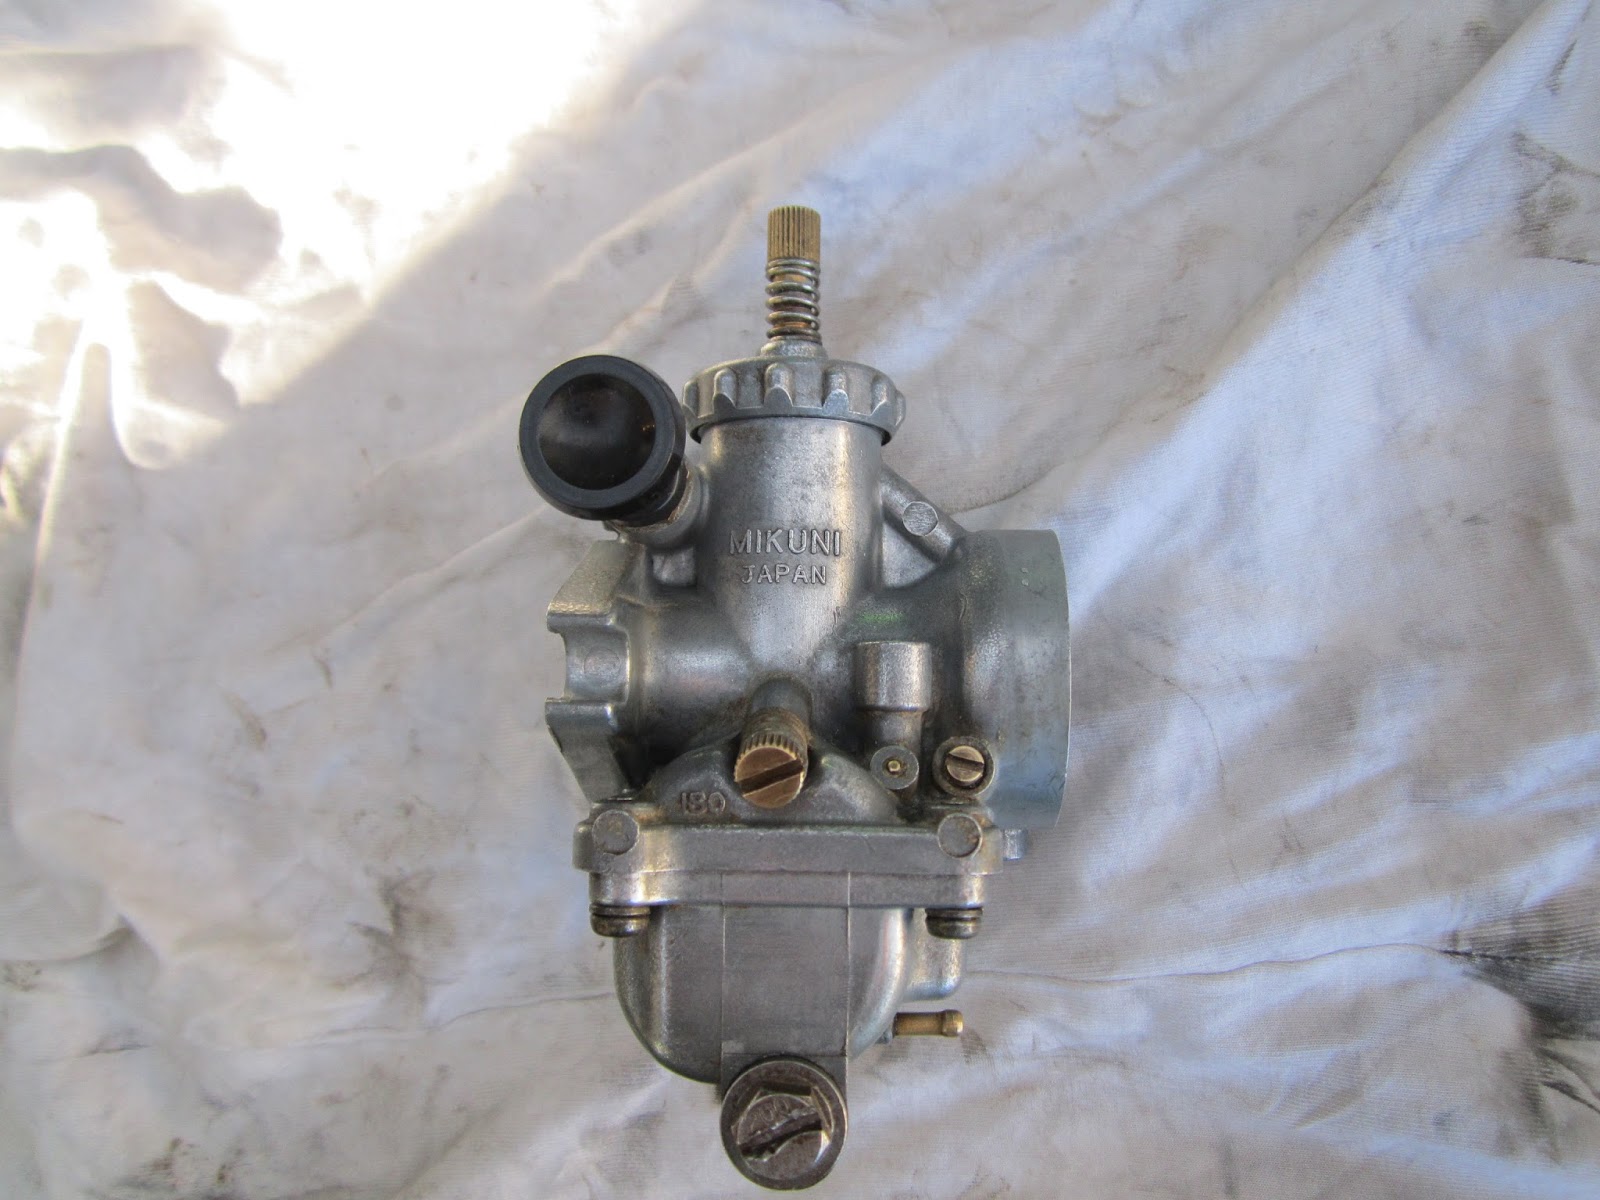
The Yamaha LS3 has a Mikuni VM20 carburetor. It's the same as the Yamaha RS100.  As I couldn't find a repair set for the LS3 I bought the one for the RX100.

Yamaha RX100 with also a Mikuni VM20 carburettor

The only difference was the air-mix-screw being a bit shorter. If it's not working I can easily replace it with the old original one.

Carburettor repair kit Yamaha LS3 - RS100
Carburettor repair kit Yamaha LS3 - RX100

Exploded view Yamaha LS3 carburettor
Exploded view Yamaha LS3 carbie

This carb was in desperate need of some TLC.

Mikuni carburettor Yamaha LS3 100
Mikuni carb Yamaha LS3 - left

Mikuni carburettor Yamaha LS3
Mikuni carb Yamaha LS3 - right

Before I opened the carbie I cleaned the outside with wax and grease remover and with a couple of steel wool pads.

Carburettor in need of some TLC

The bottom of the bowl was filled with gunk and rust, amazing how the bike ran with all the dirt in the bowl and main jet.

Dirty float bowl carburetor Yamaha LS3 100 1972
Dirty float bowl Yamaha LS3 100

After cleaning the bowl and taking out the main jet and banjo bolt I took off the floater so I could take out the valve seat and needle.

New and old valve seat and needle Yamaha LS3

Carburettor nozzle Yamaha 100cc
Carburettor nozzle


With some compressed air I cleaned all the passages and with a wooden toothpick you can reach and clean all the hard to reach corners. 

Mikuni carburettor with hand choke

Mikuni carburettor with hand choke
Mikuni carburettor with hand choke pulled out

Mikuni carburettor with pushed choke

Original air screw  longer than new one..
Original air screw  longer than new one..

As the carburettor set didn't came with a new nozzle (for some reason they almost never do) I just cleaned it and for now I'll keep the original jet needle. When the bike is running again I'll try both needles and see which one is best.

Mikuni main jet and banjo bolt Yamaha LS3 100cc
Mikuni main jet and banjo bolt

Float and new gasket Mikuni carb Yamaha LS3
Float and new gasket Mikuni carb

Mikuni carburettor with Yamaha Reed valve

Mikuni carb attached to reed valve Yamaha LS3

Mikuni carb cleaned and ready to use


Saturday, June 20, 2015

Cleaning the Steering bearings

Still had to open and check the two steering bearings. I postponed this for a while because I didn't have a steering nut wrench. That's what I thought... When my pushbike had a flat tire last week I found a combination tool in it's toolkit, including a steering nut wrench :)

The job is pretty straight forward; carefully remove the steering nut while holding the under bracket which can start to drop down. There're two bearings, each existing of two races and 19 steel balls. Over the years the grease in the bearings can become old and hard giving wear and rust a chance.

2 top races with 19 balls partly covered in old grease - Yamaha LS3 100
2 top races with 19 balls partly covered in old grease

Lower race with 44 years old dried out grease - Yamaha 100cc 1972
Lower race with 44 years old dried out grease

Collecting the steel bearing balls with a magnet - Yamaha 1972
Collecting the steel bearing balls with a magnet

When I took of the ball race (bearing) cover 5 balls fell out and it took me a while to find them all..#@!<" Anyway I soaked them in old petrol for a while and cleaned the 4 races with wax and grease remover.


Steering head section - Cleaned lower top race - Yamaha LS3
Cleaned  race - Yamaha LS3

Steel race balls after cleaning -Yamaha LS3 100cc
Steel race balls after cleaning -Yamaha LS3

After cleaning I filled the races with high temp bearing grease which I bought once for the rear wheel bearings of my Volvo 122S. All the 38 balls still look like new, no corrosion and no flat spots. Now it was a matter of simply pushing the balls in the grease filled races.

New fresh grease ready for the top race- Steering head section Yamaha LS3
Fresh grease ready for the top race

In the meanwhile the ball race cover and steering nut where nickel-plated for a bit over 3 hours.

Nickel plating the ball race cover and steering nut

When finally tightening the steering nut after reassembly take care not to overtighten  but make sure you got rid of any play. The steering rod must be able to move freely.

Steering head section Yamaha LS3 1972

Steering head section Yamaha after reassembly - Yamaha 1972
Steering head section Yamaha after reassembly

I also started the reassembly of the painted frame. Still a long way to go ;)

Reassembling frame - Middle and side stand - Yamaha LS3

Reassembling frame - using old shocker to keep it together

Saturday, May 23, 2015

Painting Yamaha Candy Brilliant Red

The original paint of this Yamaha LS3 is Candy Brilliant Red (Yamaha code 0063). But because it was all faded (the top of the tank was getting a bit silver) and rusty I decided to take it back to bare metal and repaint it in it's original colour. The problem with the older Yamaha colours is you cannot simply buy them, even if you have the original colour code. It's a big big secret...
And because it's a candy colour it's even harder to get an exact match. With the brilliant red candy colour you first have to spray the parts with a bright metallic silver. Then you mix a dye with clear coat and put several coats on top of the silver base. With every coat the colour will get a bit darker/deeper.
Spray painting candy colours is a real art and it's very hard to get a nice even coat. If you vary your moving speed or distance while spraying the coat won't be even and you'll get a patchy look. The only solution after a screw up is to bring it back to the primer (Yes, you also have to remove the silver base coat..) and start all over.
With the original paint the pin striping is done by painting the tank white, put on masking tape and then spray the silver and candy. The problem using this system with modern paints is you can get some silver edges/dots when removing the masking tape.

Before I removed all the old paint with paint stripper and a brass wire wheel on the grinder I took lots of pics and measurements of the pinstriping.
I also made a couple of paper templates to make live a bit easier later on :)

Measuring the original fuel tank pin striping

Making the pin striping templates Yamaha 100 cc
Making the pin striping templates

Making the pin striping templates Yamaha LS3 100cc
Making the pin striping templates Yamaha fuel tank

Making the pin striping templates - curves 70's Yamaha
Making the pin striping templates - curves

Back to bare metal.

Using paintstripper to get rid of the old paint - very emotional moment :(

Result after chemical paint stripping - time for the grinder

Result after some grinding with a wire wheel Yamaha fuel tank
Result after some grinding with a brass wire wheel
I also removed the dull oil gauge glass. As I'm gonna buy a new clear one I simply drilled a small hole in the plastic, took a screwdriver and pried it out the oil tank.

Removing the oil gauge glass

Oww, before I took everything back to bare metal I needed to find the exact colour match.  A couple of months ago I bought two NOS shockers in Sweden and they will be used as a colour reference when spraying the Brilliant Red Candy.
Anyway, I took the tank and shockers to my paint supplier and with the help of some colour samples we picked the best colour match.

Selection of the right candy dye Yamaha - DNA Blood Red custom candy
Selection of the right candy dye

I went for the Custom Candy Blood Red dye from DNA. With this dye and a good spray technique it's possible to get an exact colour match. Luckily I've a friend who's a real candy artist.

Here are some pics of the whole painting process.

Fuel tank Yamaha LS3
Fuel tank Yamaha LS3 - filler

Chain case Yamaha LS3 bright silver

Bright silver metallic base coat fuel tank Yamaha 100 LS3
Bright silver metallic base coat

Bright silver metallic base coat Yamaha LS 1972
Bright silver metallic candy base coat 

Brilliant Red Candy - 3 coats - DNA Candy Blood Red
Brilliant Red Candy - after 3 coats.  The first coat looked purple..

3 coats Brilliant Red Candy plus 3 clear coats

3 coats Brilliant Red Candy plus 3 clear coats Yamaha 1972
3 coats Brilliant Red Candy plus 3 clear coats Yamaha LS3 1972

Perfect colour match Candy Brilliant Red - DNA Custom Candy Blood Red - Yamaha 1972
Perfect colour match

Yes, I really love this candy colour! The next morning we rubbed it back for the decals and pin striping. I found 2 side cover decals on EBay,  and for the pin striping I went to a Sign shop who were happy to cut the pinstripes with the right width from the best vinyl available.  Best thing was it was really cheap too :)
I started with the lower straight pin striping part. Be careful not to stretch the vinyl and don't push it to hard on the paint unless you're sure it's in the right position. The glue form the vinyl will soften the paint and it's possible to pull the paint off the tank if you're not careful with it.

Pin striping the Yamaha LS3 fuel tank

Pin striping the Yamaha LS3 fuel tank 1972 - using a template for the curves
Pin striping the Yamaha LS3 fuel tank - using a template for the curves
I found the top pin striping the hardest part, making the right curves and trying not to stretch the vinyl. There are some small imperfections but that will bring it closer to the original pin striping ;) . When I measured the original I found that the left and right side were a bit different, hand labour in the 70's has it's charm.

Original pinstriping finish in the 70's - Yamaha 2 stroke fuel tank
Original pinstriping finish in the 70's
Pin striping the Yamaha LS3 fuel tank - first top line

Pin striping the Yamaha LS3 fuel tank - second top line

Pin striping the Yamaha LS3 fuel tank - half way

Side cover stickers decals Yamaha 100 LS3

Pinstriping all done - ready for some clear coat
Parts - parts - parts
Update 05-06-2015.
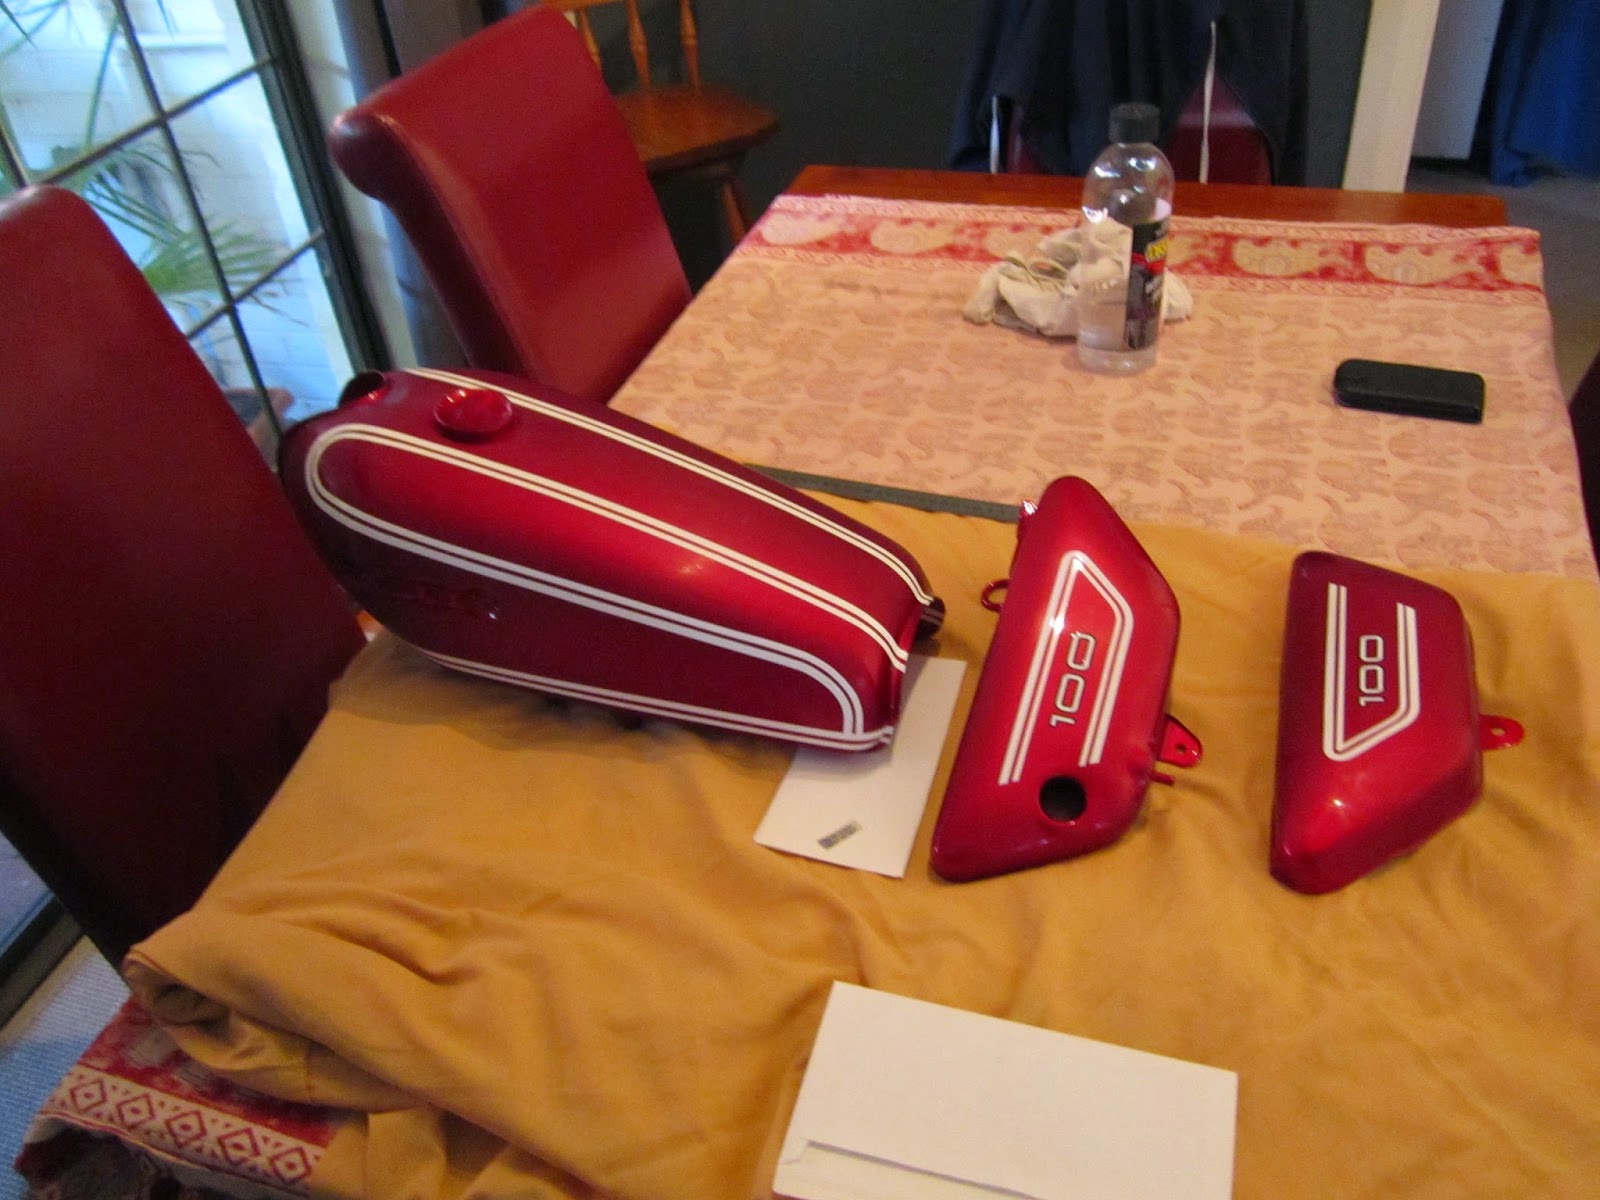
The tank and side cover after 3 clear coats after pinstriping.

Fuel tank Yamaha  Brilliant Red Candy plus 3 clear coats after pinstriping
 Brilliant Red Candy plus 3 clear coats after pinstriping

Fuel tank Yamaha  Brilliant Red Candy plus 3 clear coats after pinstriping
Fuel tank Yamaha 1972 Brilliant Red Candy

Fuel tank and side covers Yamaha LS3 Brilliant Red Candy plus 3 clear coats after pinstriping
Fuel tank and side covers Yamaha 100 LS3 Brilliant Red Candy

Fuel tank Yamaha  Brilliant Red Candy plus 3 clear coats after pinstriping
Fuel tank and side covers Yamaha 1972 Brilliant Red Candy